
How to Swap a Ribbon Microphone Transformer
Thursday, December 31st, 2009 | by matthew mcglynn
 Transformer upgrades for ribbon microphones are one of the hot new trends in the industry, with numerous vendors offering “pre-modded” ribbon mics with Lundahl or Cinemag transformers.
If you think your ribbon mics would benefit from a transformer upgrade, you can change the transformer yourself, probably within one hour. It’s an easy process for anyone with rudimentary soldering skills. Read along for detailed instructions. (Click any picture below to see a fullscreen version.)
Mise en place
 You’ll need a clean, well-lighted place to work, a passive (non-phantom powered) ribbon mic that you don’t mind replacing if things go bad, and:
- A soldering iron
- Solder
- Solder wick (optional, but potentially helpful)
- Wire snips
- Wire stripping tool
- Screwdriver(s)
- A replacement transformer, with wiring guide
The actual soldering is not challenging, but if you have no experience at all you’ll benefit from reviewing a soldering howto before you begin.
If you’re looking for a new transformer, here are all the potential sources we know about:
- Samar Audio Design RT32 and RT36 (1:32 and 1:36 respectively)
- Cinemag CM-9888 (1:28)
- AMI TR22 or TR42 (1:42)
- The Peluso transformer whose part number escapes me; call John Peluso for info
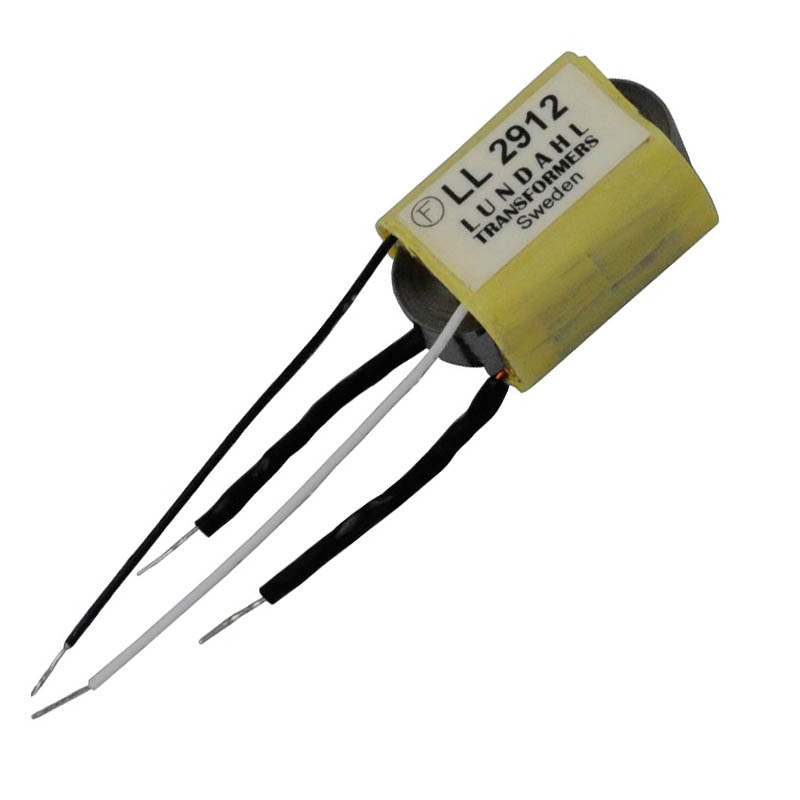
- Lundahl LL2912 (1:37)
- Sowter 8074 (1:40)
In my experience, transformer manufacturers’ installation instructions are not very clear. Wiring the transformer incorrectly will, at best, put your mic out of phase (with respect to the nominal “front” of the microphone), or at worst, render it mute. Check with the transformer vendor if you have any questions.
Disassembly
 Passive ribbon microphones have only two components: the ribbon motor assembly, and an output transformer. You’ll need to expose both, and probably remove them entirely from the microphone body.
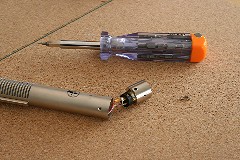
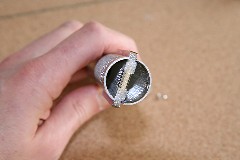
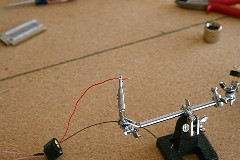
For the ribbon mic model pictured, you’ll begin by removing the screws that hold the XLR jack into the tail of the body. The jack itself is mounted inside a metal housing, held in place my a small inset brass screw that must be screwed into the XLR jack in order to slide the housing off.
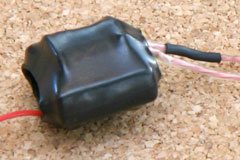
 You should be able to see the transformer inside the mic body, once the XLR jack is removed.
Don’t try to pull it out. It will go out the other way.
 Remove the top cap on the mic body.
 This reveals the ribbon motor.
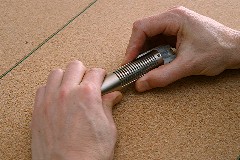 The ribbon motor can now be pulled out of the top of the mic. Work slowly and carefully, as the ribbon is fragile.
Be sure the XLR jack has been unscrewed. If it is still connected, you’ll break wires when you pull the ribbon motor free.
Don’t blow on the ribbon. I’ve seen recommendations to wear surgical masks for this phase of the operation. I find that precaution unnecessary (and frankly a little ridiculous), but for sure you don’t want to sneeze while the ribbon is within your blast radius. (Turn your head, and then cough.)
Note which side of the ribbon motor faced the logo side of the microphone body. Unless your mic was out of phase to begin with, you’ll want to put the motor back in with the same orientation.
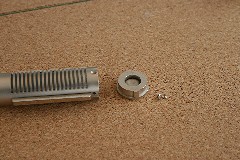
Once the ribbon motor is free, carefully pull out the transformer and XLR jack from the top of the microphone.
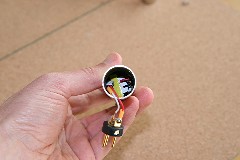
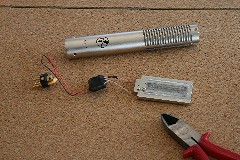
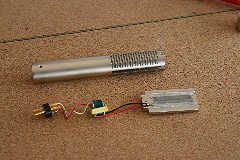 This picture shows the heart of most of the Chinese-made passive ribbon mics on the market: XLR jack, transformer, ribbon motor.
Note that there are really only three basic Chinese-made ribbon motor designs; even if your mic looks different than the one pictured here, chances are good the motor and output circuit look exactly like this one.
Remove the old transformer
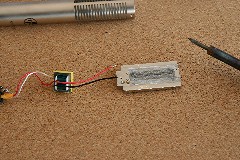 For future reference, make a note of how the transformer wires are attached.
The wire colors on the new transformer will likely be different (and even if they’re the same, you can’t trust that the orientation will be the same). Nonetheless, knowing how to reassemble the mic in its original configuration might be useful, so write it down or take a picture.
Desolder the transformer leads from the ribbon motor. You don’t need solder wick for this; just heat up the solder spots briefly and the wires should pop free.
Do the same for the other end, to desolder the wires from the XLR jack.
Prepare the new transformer
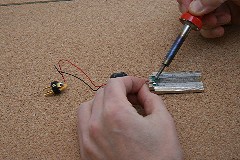
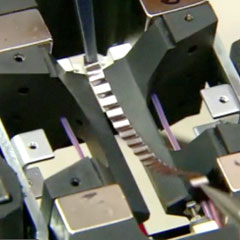
Tin the ends of the wires on the new transformer. Having a third-hand tool as pictured is useful but not critical.
Important: trim the transformer input leads as short as possible — to 2 inches or less, for the body design pictured here. This avoids loss of signal strength in the low-impedance part of the circuit. Having long transformer-input wires can adversely affect the mic’s sound and output level. That said, be sure to leave enough length on the input wires to allow the transformer’s output wires to reach the XLR jack. Just lay out all the pieces next to the mic body, before you start cutting wire, to make sure everything will reach.
Transformer installation
 Solder the transformer’s shortened (and tinned) input wires to the ribbon motor. Swapping the relative position of these wires will put your mic out of phase, so don’t do that. Refer to the wiring guide for your transformer.
Then solder the transformer output wires to the XLR jack — most likely to the same pins that were used before, but consult your wiring guide for best results.
If you swap the relative positions of the input wires or of the output wires, the mic will be out of phase. If you swap both the input and the output wires, the mic will be 360° out of phase, which is to say, in phase. 🙂
If you install the transformer upside down, with the ribbon motor wired into the transformer’s output leads, and the transformer’s input leads attached to the XLR jack, you’ll probably get no signal from the mic at all.
Assembly and Testing
 Reassemble the microphone. For the model pictured, drop the XLR jack into the top of the mic body, followed by the transformer and finally the ribbon motor.
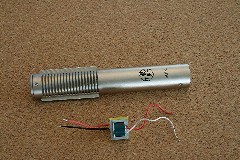
You’ll probably want to test the mic for phase before completely reinstalling the ribbon motor, just because it’s difficult to disassemble again. Not only can the motor housing become wedged tightly into the body; also the transformer can get wedged inside the mic body. Transformer packages that are wrapped, such as the one pictured, are especially hard to remove.
If your mic is out of phase, you can simply rotate the motor 180° and reinstall it, so long as your ribbon motor uses a symmetric design (in which the ribbon is exactly centered, front to back, in the housing).
Some ribbon mics offset the ribbon to the front or back. This “offset ribbon” design was developed and patented by Royer, but some Chinese manufacturers have copied the design. For such mics, you probably will be happier long-term if you wire the mic so it is in phase with the motor installed properly with respect to the logo side of the mic body.
 On the other hand, you could decide it’s easier to write “front” on the rear side of the mic body with a permanent marker.
Once you’re satisfied that the mic is fully operational and functional, put all the screws back in. Then go record some music!
Beginner questions and expert advice are equally welcomed in the comments!
Related posts:

Tags: DIY, microphone, mod, ribbon, transformer
Posted in Microphones | 8 Comments »
adrian
January 14th, 2010 at 5:55 am
Aaah need help!! I assembled my fathead w/ an ll2912 and I noticed a dramatic decrease in volume in it. What could that mean?
matthew mcglynn
January 14th, 2010 at 7:15 am
Adrian – could you have put the LL2912 in upside-down? If so, you would certainly notice a decrease in output level — although probably you would not be able to detect any output at all, except at maximum preamp gain and by screaming into the mic, because your 1:37 step-up transformer would be doing 37:1 step-DOWN.
Riccardo
April 7th, 2010 at 10:06 am
Hi. You suggest Sowter 8074 transformer for passive ribbon mics. Should it fit well in an active ribbon too? Thanks
matthew mcglynn
April 7th, 2010 at 10:08 am
Riccardo, it might well fit, but I wouldn’t recommend swapping transformers in an active mic. The amplifier circuit is likely tuned for whatever transformer is in there already. Changing the impedance or gain of the signal going into the amplifier could have bad results.
Biller
May 2nd, 2011 at 10:13 pm
I got a Oktava ML-52-02 that never worked.
If I run it into a pre-amp, I get nothing- even if I crank the gain, just nothing.
I’ve taken it apart, done what diagnostics I could, replaced the ribbons (I know they weren’t the problem, but one had some nasty sag), redone the wiring from the motor to the transformer; no progress for those attempts.
Here are my three best guesses at what may be wrong:
1. Blown Transformer (Is that possible/likely?) Is there a method to check a transformer?
2. The motor on the ML-52-02 is a dual element- the top of the motor has two wire runs that head to the transformer, but maybe there’s a gap that’s supposed to separate them and that gap has closed or is somehow otherwise shorting.
3. Maybe the wiring to the XLR port is bad. I got the mic used through ebay- so maybe some joker got the wiring wrong. But it seemed like I was the first person to get inside and tamper with it.
If worse comes to worse, I can send it to Michael Joly and have him set it straight, but I kinda want the DIY victory (and to use the budget to have him supe up my Oktava MK-012’s). Any insight would be much appreciated.
Nick
October 7th, 2012 at 8:38 am
I have an MXL V69xm, that I was interested in swapping out the transformer for a Jensen made one. If not Jensen, my second choice would be a Lundahl or Cinemag. How would I go about finding the correct transformer to swap it with?
matthew mcglynn
October 7th, 2012 at 11:12 am
@Nick, some vendors might keep a compatibility database. But I suspect you’d need to figure out your transformer’s turns ratio in order to find a suitable replacement.
However, I would be cautious about expecting magical sonic improvements from a transformer swap. Best results are obtained by treating the capsule, tube, circuit, and transformer as a system, which they necessarily are. I encourage experimentation but advise that you might go through several transformers as well as alternative capsules, capacitors, and tubes before you develop a combination that is truly better than the original.
Lassi
August 13th, 2013 at 10:26 pm
Thanks for the nice article!
A comment/question on the part “You’ll probably want to test the mic for phase before completely reinstalling the ribbon motor, just because it’s difficult to disassemble again.”
I guess in the situation where the mic is out of phase and disassembly is difficult, the phase can also be corrected by swapping the wires to the XLR connector? This part would be easier to reach inside this type of mic. 🙂