
10 Voice Recording Essentials
Monday, December 3rd, 2012 | by Randy Coppinger
If you are a singer, voice actor, producer or, recording engineer, here are ten items worth considering for an effective voice recording session.
- Tart Green Apple
This is a common remedy for sticky, clicky mouth noise. The tartness gets the mouth wet. You don’t have to eat the whole thing, just a little bite as needed during the session. There are many other remedies (that don’t go bad as quickly). So, bring a tart apple or find something else that tames the mouth noise. - Comfortable Headphones
I really hate listening on headphones for long periods of time. I sympathize with performers who may be working in them for hours. Make sure the cans are comfy. Otherwise they will become a distraction, fatiguing wearers instead of helping the session run smoothly. - Dress In Layers
Studios try so hard to get air comfortable and quiet. But even the best built system can be too warm or cold for someone. Worse, the temp may rise and fall uncomfortably. Wear a few thin layers — nothing starched, because it’s noisy — to get comfortable again quickly. - Popper Stopper
These don’t stop plosives completely, but can keep them tame. - Low Rolloff
It shocked me when I finally discovered that this is the secret to minimizing 90% of p-pops. Roll off the bottom at around 100Hz (18dB/octave slope) before the compressor, and have the aforementioned popper stopper. Then, only the most plosive blowhards will p-pop. Well, mic position matters a little too. - Analog Compressor
I don’t believe analog tape sounds inherently better. But I do think that people who know how to record to it also condition their signal before they hit the tape. I think that if you present an AD [analog-to-digital] converter with a great signal, you give it a better chance of translating the audio. Almost all voice recording benefits from compression, so I like to put a touch on before the AD converter just like professionals did in ye olden times. - Analog Fader
Most people drop their volume at the end of a phrase or sentence. It’s a natural thing to do before a pause, especially as air gets used up. It’s not difficult to anticipate the end of a sentence, providing the opportunity to raise the volume a little at those quieter moments. And if someone is performing more than one take in a row, patterns develop, providing additional opportunities to reach for the quiet moments and pull back on the loud stuff. Sure, you can do that after the AD, but I think you give the converter a better signal if you do some of that up front. - Two Great Microphones
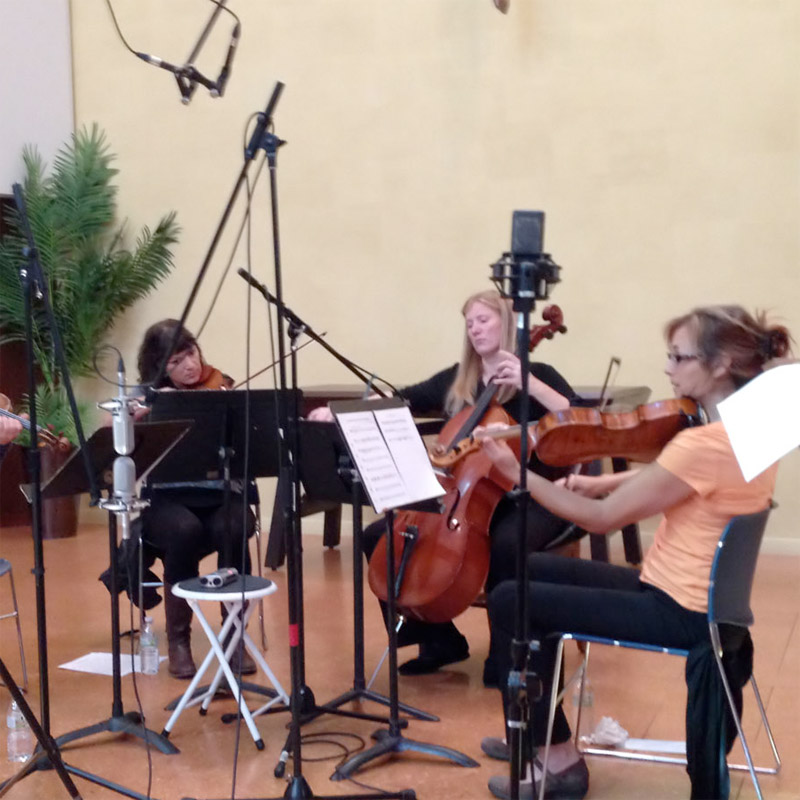
Most if not all of the voice recording will be the first mic, probably closer to the performer. But if you put a second mic a bit behind the first one and record it 12dB or lower than the first one, you just bought yourself some distortion insurance. Now don’t use them both at the same time, but back and forth as necessary. If things go well, you will never need the second mic. Like the fire department. - Packing Blankets
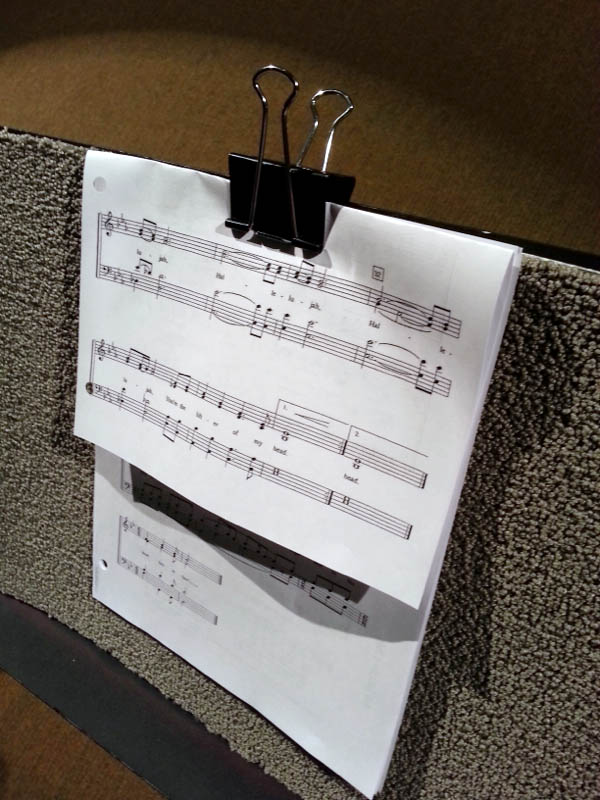
If there are unwanted reflections in the mic, something is rattling, or it’s deathly cold, nothing is as handy as a packing blanket. They’re especially useful for location recording, acoustically untreated spaces and multi-use rooms. - Fully Accessorized Music/Script Stand
I prefer to use two stand lights for better coverage. A piece of carpet covering the stand helps reduce reflections back into the mic, and reduce vibrations. Always have writing utensils (pencils erase!).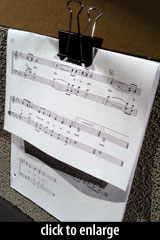
Many people tend to drop their head away from the mic as they read down the page. A large paper clamp at the top of the stand helps keep eyes looking up, which can raise the head overall and even be used to hold a folded piece of paper after you’re done with the top portion.
matthew mcglynn
If you found this article useful, please “like,” tweet, and share it with your social circles. Together we can raise the quality of voice recordings web-wide! 🙂
Randy Coppinger is a microphone-slinging coffee loyalist who lives and listens in Southern California. Visit Randy online at randycoppinger.com.
He recently reviewed 7 unidirectional ribbon microphones for voice recording — from the vintage RCA 77DX to the $4700 AEA KU4 to a couple vintage Shure and Oktava models you can score on Ebay for less than $300.
Related posts:


Posted in Studios, Technique, voiceover | 34 Comments »
David Das
December 3rd, 2012 at 1:40 pm
Good tips. I would add to that: take the time to give the vocal talent a good mix. Make sure they can hear themselves at a comfortable volume, and any accompaniment at an appropriate volume. Too loud or too soft, and they may overstrain their voice to compensate. I’m also a huge fan of stereo — so much more comfortable to listen to, rather than mono, which messes with my head and doesn’t let me hear precise pitch changes as accurately.
Stephen Stanton
December 4th, 2012 at 11:20 am
Great stuff as usual Randy! Folks, you should watch his video on rolling up a mic cable 🙂
In addition to the large paper clamp on the music stand, I find that “chip clips” (for keeping bags of potato chips fresh) cover a wider area of the paper & the spring tension is less, making it easier on your fingers if you have a lot of pages to work with. I wish more studios had them…!
Steve Faul
December 4th, 2012 at 12:03 pm
Some great tips here. I learned about starchy shirts the hard way. Not only was I uncomfortable, but I couldn’t move.
Randy Coppinger
December 4th, 2012 at 1:35 pm
Yeah, Stephen, those office style clamps can put a death grip on things. I’ll have to try a “chip clip.” Great suggestion.
John McCortney
December 11th, 2012 at 8:27 pm
Great advice, Randy, and thanks to everyone else, too. I’ll be buying a few office style clips tomorrow! I have a suggestion for another accessory: a tray table for beverages, the green apple, and the other miscellaneous stuff which the talent inevitably brings in to the studio. The talent will appreciate the convenience and you won’t have to clean up the mess when the beverages get kicked over.
Aaron Lyon
December 16th, 2012 at 4:53 pm
Mic placement is a whole other article, I suppose, but to add to the good advice here: Move mic placement higher on the vertical axis, as high as talent’s forehead, to help decrease clicky mouth sounds.
Big, deep voices will benefit from this, too, to reduce chest voice; tiny voices may require the opposite.
Randy Coppinger
December 16th, 2012 at 6:16 pm
Thanks Aaron. I too like to start above and aim down. In addition to helping avoid mouth noise and plosives, it picks up some of the mask, which I think of as the resonator for the voice. It tends to sound most natural. By comparison, a mic position below has more head voice and sounds to me like FM radio. In the end, whatever sounds best is where I will put the mic, but i agree that above the mouth is a good place to start.
Mike Baker
December 16th, 2012 at 7:25 pm
Excellent list. I’d add one other thing (that’s not nearly as sexy/interesting as a great mic, or even a green apple): properly-formatted, large-font copy.
When you’re tracking VO and moving along at a good clip, there’s nothing more frustrating than having a missing comma or weird run-on sentence bringing everything to a halt.
Plus, if your talent walks into the booth and sees a clean, legible sheet of paper on the stand, it immediately generates a professional impression and goes a long way towards creating rapport with the producer.
Brian Welden
December 17th, 2012 at 7:04 am
Thanks for the really great tips! The “Two Great Mics” tip is one I hadn’t seen before. Keeping the talent comfortable is really important. I work from a home-based studio as both talent and occassionaly as producer, and the WhisperRoom can get really warm after a while (the ventilation option isn’t viable as it introduced a 60-Hz hum into everything). Don’t forget to provide (or take) an occassional break.
hollsa
December 17th, 2012 at 1:39 pm
randy, about tip #8, you say to use two mics but then you say don’t use both at the same time. i’m confused! s’plain, please?
Randy Coppinger
December 17th, 2012 at 1:57 pm
Good question, Hollsa. Record both microphones at the same time, but only listen to one at a time (typically the front mic with higher gain). If the primary mic channel blows out, you can cut to the other mic for a distortion free version of the same take. Using two spaced mikes (difference in timing) simultaneously with similar volume may cause comb filtering- http://randycoppinger.com/phase/
matthew mcglynn
December 17th, 2012 at 2:08 pm
@Hollsa, to put Randy’s reply in other words, you do record both mics, but you don’t include both in the mixdown. Use the second mic in the mix only if the primary mic’s track is distorted due to some performance change.
@Randy – would you typically use two of the same mic, or would you put a different type farther back? If the latter, how do you account for the tonal differences when you need to cut away to the backup mic in a mix?
Randy Coppinger
December 17th, 2012 at 2:39 pm
Matt, shouting tends to change the color of the voice. So if the 2nd mic is a little different sounding, you tend to notice the change in performance more than the change in microphone. Also, a bit of tonal shift often sounds better than distortion. 🙂
If placed 6″ or more behind the primary mic, a more directional 2nd mic will help things sound less roomy, for a better match. And I’m never reluctant to EQ the 2nd mic to improve the match for a seamless transition in/out.
For example, here’s a pic of a Neumann u87Ai in cardioid as front mic and a Sennheiser MKH-50 supercardioid as the far mic- https://picasaweb.google.com/lh/photo/yxXd8-Xan7SxUb0JZEXlz9MTjNZETYmyPJy0liipFm0?feat=directlink
Kasper
December 18th, 2012 at 3:23 am
You could also use a y-split, and feed the one mics signal to two similar preamps running at different input gain settings. Then the difference between the low/high gained takes wouldn’t be influenced by different mics, different distance.
Howard Ellison
December 18th, 2012 at 3:52 am
Totally sensible advice, every word of it, and great original tips. It’s affirmative to see Randy favours a touch of analogue comp before going digital. Me too, and then a follow up if needed with post comp/limit. That way I think you get fewer artefacts, less of a deejay sound, with the task shared and neither type overworked.
Randy Coppinger
December 18th, 2012 at 10:44 am
Kasper, that’s a cool idea but it gets tricky. You definitely only want to activate one phantom power for a condenser mic, and then the other preamp get backflow from the one pushing it, which it is not likely designed to encounter. Condensers, ribbons and moving coil mics all present resistance to the preamp – splitting that between two preamps could adversely affect the sound. If distortion occurs at the capsule or in the mic electronics, you get distortion on both channels. In practical application, two mikes are simpler and more trustworthy.
John McCortney
December 28th, 2012 at 8:18 pm
I’d like to add to the excellent advice of Aaron and Randy in comments numbers 6 and 7. I, too, like to place the mic higher than the performer’s mouth but I also move the mic to the side by about 45 degrees, still aimed at the performer’s mouth. Moving off center allows greater range of vertical and proximity placement (less visual intrusion) and still keeps the mic out of the direct path of the plosives. The only catch is if your talent turns their head from side to side while reading. With that exception, this technique works well for me about 90% of the time.
Happy New Year to all!
Randy Coppinger
January 1st, 2013 at 9:04 pm
7 Tips For Keeping Your Voice Healthy
http://bobbyowsinski.blogspot.com/2012/12/7-tips-for-keeping-your-voice-healthy.html?m=1
Jason Cox
January 7th, 2013 at 9:12 pm
I was told that recording in 24 bit (if gain staged properly) you don’t need a hardware compressor on your vocal chain. Just mic to pre to ad. Using the flexibility of software compression you have a non destructive solution to compression.
What are your thoughts on that?
Randy Coppinger
January 7th, 2013 at 11:16 pm
Jason, someone once told me compression is like painting: if you try to do everything in one application, you make a mess. I prefer to apply a little compression at several places in the recording/mixing process, including analog. I also like to present an AD converter with a good sounding signal — and for me — compression often helps a voice sound good. I’m not recommending heavy compression up front, but I am saying some analog compression is at least worth considering. So while the current trend is to avoid compression until later, I believe judicious use of analog compression may dramatically improve voice recording. And I strongly believe in using an analog low rolloff (see #5). Thanks for the question.
Sam @ The Edit Rooms
January 14th, 2013 at 7:22 pm
Tart green apple?? Genius, have never heard this and am sure clients will be giving me some odd looks soon,,,
Simon White
March 7th, 2013 at 12:28 pm
I use an iPad for lyrics to avoid paper and pen noise.
yoav tzfati
May 30th, 2013 at 12:03 am
“I think that if you present an AD [analog-to-digital] converter with a great signal, you give it a better chance of translating the audio” – I’m pretty sure this is wrong. When recording to tape the compression helps, because the tape has distortion that rises with level, and recording a low level makes the hiss more prominent. But the distortion of most reasonable AD converters is undetectable at reasonable input levels, and in 24 bit the noise is too. With AD converters there is a large range of levels that can be recorded without noise or distortion, so there is no need to use compression or automation in a situation where you don’t have much time to apply them exactly the way you want to, like you can do in the mixing stage.
Sam Barker
June 3rd, 2013 at 3:21 am
These are really useful tips – dressing in layers is so true – you can never predict the temperature of a studio, so layers are definitely advised! Thanks
Fowler Carson III
August 8th, 2013 at 6:12 am
Hey Randy,,,,What’s up? Im new to your blog, I love what I’m reading about mic’s. Killer tool you have here!!!! I need help identifying a mic that Alison Kraus uses in the studio that I have seen on her videos. A black mic she sings through,,,,,,I can’t find it anywhere!!! Maybe you can help….
Adios
Randy Coppinger
August 8th, 2013 at 10:53 pm
Fowler, the mic in this video…
http://youtu.be/R1pwkpDEvhM
…appears to be a Sony C-800G
http://recordinghacks.com/microphones/Sony/C800G
Henrik Skram
September 18th, 2013 at 4:47 am
Hi,
great tips!
Something I alwyas do, and that I find useful, is to record 10 sek of silence after the narrator has left the session. This way you have a noise-file you can use as “band-aid” for those pauses with mouth-sounds or other. The benefit is tha instead of cutting the audio, which leaves a dead-silent gap, you have continous audio.
Cheers, Henrik
Henrik Skram
September 18th, 2013 at 4:52 am
.. adding to my comment: copy a small clip of the silent audio-file to the clipboard, and paste where necessary.
H
Randy Coppinger
December 6th, 2013 at 7:31 pm
I learned so much about voice recording from my hero, Doc Kane. This video is full of great tips, and you can see a lot of setups with 2 or more microphones for recording voice-
http://soundworkscollection.com/videos/veteran-adr-mixer-doc-kane-of-walt-disney-studios
Simon
March 29th, 2014 at 1:29 pm
> I was told that recording in 24 bit (if gain staged properly)
> you don’t need a hardware compressor on your vocal chain.
For a vocalist, the instrument is the microphone and the compressor, not just the mic. Same as for a guitarist, the instrument is the guitar and amp, not just the guitar. So a little compressor before the digital input can give you the exact sound you want for a singer and it makes the singer happy to hear themselves that way also because they hear a more-finished sound. They sound like they expect to sound from hearing vocalists on finished recordings, not like they are just singing acoustically.
And if you are feeding your digital input a big fat signal that doesn’t clip, you are painting the whole soundscape with the voice and getting a really high-resolution sample. You see a nice fat waveform with lots of information in it, lots of detail, lots of punch.
You definitely don’t want to overdo it. I use the second mic trick detailed above. I’ll record the main mic through an analog compressor, and record the second mic bare. Then if I put too much compressor on the main mic and want less, I can just go to the other mic’s recording and start from there. I just record to one stereo channel and pan it all the way left or right to get either mic.
I do the same with bass guitar. I record it in stereo, with one side running through effects and one side direct. Then I can use either one or a mix of both when mixing. Also works for acoustic guitar with one side mic’d and one side direct from the guitar’s pickup. You’re getting extra tracks essentially for free, no extra recording time, and they can be remarkably useful when mixing. Sometimes when you are recording you think one side is best bit when mixing you realize the other is best.
Lori Scandolaro
September 26th, 2014 at 7:03 am
Great article!
i found out that a small pencil, a wood one, might be very helpful. if the sound of the mic is exactly what you like but too air is hitting the capsule, to reduce plosives try to put a pencil in front of the mouth. placed between the pop filter and mouth can give you strong reduction of plosive without changing the sound at all. just because it deviates air from mouth to side. i thought it was a stupid idea till i tried it. it avoids to do some compression in the low end.
Bill Cannon
January 28th, 2015 at 7:37 pm
Hey Randy Thank you for your tips and strategies, it is much appreciated. I am just starting out as a voice over performer, I am a little confused as far as equipment. I know that the preamp and audio interface are very important as far as essential equipment in your sound chain. My confusion is, I understand that a mixer such as Focusrite contains both preamps and audio interface. Is it better to purchase a mixer like this one with both combined or to separately purchase a preamp or interface? Thanks again Randy
J..Johnson
December 13th, 2016 at 12:08 am
Lose the headphones, they make most people sing sharp. Lose the popper stopper. Most people are very familiar with their SM-58 or whatever, but the typical LDC hung from a boom upside down with a pop filter invites zero interaction., Hand them a cheap LDC, no stand, and let them experiment with where the action is, if they are not experienced. Put the actual recording microphone in omni, if you don’t have a microphone with omni, buy one. Set it back from the monitors in the control room about six to -eight feet, hopefully using Auratones, or a speaker of similar limited bass response, like computer speakers. Encourage them to work the proximity, as there is no bass swell to cause problemsl, details will emerge in quiet passages when you lean in. All this counter-intuitive stuff will take experienced singers out of their rote approach, and get them listening to their actual voice. Less experienced vodcalists will benefit from hearing their voice naturally, and will find their pitch easier. And the sound will be far more musical, just try it….And now that editing is so easy, you can clean up any spills after doing a comp…To aid in that, compression is perhaps better applied in post..
Geno
July 30th, 2017 at 11:18 pm
Instead of clips to keep copy on the music stand, try a few small magnets. They work better than clips because they won’t rattle.