Aspen Pittman Interview
This interview appeared on the M-Audio website in 2003.
Anyone who played through a 1973 Acoustic channel switching amp, or plugged a pair of matched 6L6 Groove Tubes into an old amp, or actually met the man in person has experienced the one-of-a-kind passion of Aspen Pittman. His vision and energy are second to none. There’s a little bit of Aspen in each tube when you ‘GT’ your amp or buy a Groove Tubes microphone.
M-Audio was pleased to recently announce its distribution agreement to market the Groove Tubes GT microphone family, including the GT33, GT44, GT57 and GT67. Up next are the new Model 1B and Model 1B-FET that offer an even more affordable price point—and there’s more to come.
M-Audio had the pleasure of talking with Pittman on the phone from his Groove Tubes office in California’s San Fernando Valley. There are few equal teachers when it comes to being truly fascinated by tube, speaker, preamp and tube mic technology. If you’re curious about why your voice, guitar and amp sound like they do, listen in and read on—the man has collected over 300 vintage tube amps and 100 vintage mics, authored four editions of his popular book, written countless articles for mags like Guitar Player and built matched tubes for Eddie Van Halen, Buddy Guy, Robben Ford, Slash, Buck Owens and many, many others.
How did Groove Tubes get started?
 I’m a musician with an unending hunger for why things sound good and sound bad, and I try to make things that make things that sound better, because I figured out why they sounded good and bad. I figured that I should be able to do even better. And that’s the idea behind our company.
We came up with all these different ways of measuring and matching tubes and finally we hit on what is still today the “Groove Tubes process.” We are more interested in the harmonic distortion characteristics that are different from one tube to another, and if we can put two tubes that are harmonically matched together, then they tend to make a much better balanced and fuller sounding tube amp. From working in Guitar Center in my earlier years, I learned about the differences between drum sticks, about how they get rolled and some aren’t as even as others, or how to look for balance in the way sax reeds are cut. It’s like listening to a hi-fi with two unmatched speakers, or making a spruce top guitar and not bookmatching the top of the spruce: balance is the whole issue. Reed players put a reed up to the light and if they have a heart shape to them then you’ve got a balanced reed, but if it looks different color on one side or the other then the reed isn’t cut right.
There’s a million examples from the music world I came out of that said, “things have to be balanced.” Tune the drumhead to make sure its evenly tensioned all the way around, etc., so I thought this might be something that was going wrong with our guitar amplifiers in those days 22 years ago. “If we don’t have matched tubes in there that are putting out the same harmonic distortions, maybe that’s the problem.” So our goal was to come up with a system that would predict what the tube would sound like. And was there ever a difference! All of a sudden the notes sustained longer, the chords were full with no harmonic imperfections, no phase cancellation. We were then off on our little adventure with Groove Tubes.
What’s your overall design philosophy?
“Think of the tube as a tone generator, not as an electronic device,” says the informative Pittman, owner and president of Groove Tubes and author of the 800-page The Tube Amp Book, recognized as the ultimate reference guide for tube technology. “When you buy a pair of Groove Tubes and plug ’em in, you’ll hear a difference. We’re doing transducer-based engineering here derived from researching vintage microphones, guitar amps and mic preamps from times past.”
“We build on engineering traditions by bringing new concepts, materials or designs to market built on a reverence for the great classics,” Pittman says. “Not carbon copies but faithful ‘remixes’ of the original concepts. We have four or five open projects right now with M-Audio, and my job on that team is to answer these questions: What does this product do, how can we get an edge, what’s our advantages and how do we move the standards ahead. Those kinds of things.”
Could you explain the sequence of events led to your partnership with M-Audio?
Groove Tubes released seven mics with Alesis before their subsequent bankruptcy and reformation. After that began looking for a new partner in 2001 to release our new line of redesigned mics that also allowed me to have total carte blanche supervision over design, construction, manufacturing and quality control. These are all big things when it comes to maintaining our tight tolerances in offering affordable tube mics for stereo recording and not charging extra for the matched pair.
What makes a great tube mic sound so good?
If I talk about the relationship of the Stratocaster guitar and the Marshall amplifier or the Gibson guitar and the Fender amplifier, I’m talking essentially about two components that ultimately become one thing in producing an electric guitar sound. Each has a very different sonic signature. I think of us as the Paul Reed Smith electric guitar of modern microphones. They’re making better Les Pauls today by studying the past, just as we make better condenser mics by using modern materials and production techniques to make better condenser mics that build on the classic mic heritage.
If I say “Stratocaster” or “Les Paul,” you know that I’m talking about two electric guitars that are electronically equivalent but very different in the way they sound. A good way to think about a condenser studio microphone is to look at the relationship between a guitar being equated to a mic capsule or the transducer of the mic, and the amplifier being equated to the electronics of the overall package. Together the guitar and amp make a sound, and together the capsule and electronics in a studio condenser microphone become the whole package of what you’re listening to. With our line of mics we generally use the same capsule but offer also a package with different electronics.
Which mics have interchangeable capsules?
The GT 33 and 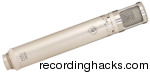 GT-44 have the same three optional capsules that can be screwed into their housing but they’re connected up to two different sets of electronics. Now, when we talk about the transducer side or the capsule side, it’s a whole conversation as to the different variables and the ways things are done. This is very similar to the way that Gibson or Fender built and still build electric guitars, the same concept just different paths. We have ways we do solid-state electronics and ways we do tube electronics. We have a very different drum that we march to than the “industry standard” in both of those categories, as well as the way we approach the transducer or the capsule end of the system.
Can you give some more examples?
Well, the 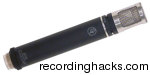 GT 33 and GT 44, which we can call medium-sized capsules, could be similar to what we might say is the Strat or Fender world of single coil pickups, if you will. Its a sound that is a little more defined and cuts well in a band, a little thinner compared to a double coil Gibson humbucker sound, and its more articulate in some ways you could say than the fatter, thicker fuller Gibson sound. That’s very typical of what you’re looking at in differences between a medium- and large-sized mic capsule.
Is there a way to categorize the different mic sizes and their ideal usages?
Typically capsules can be grouped into three basic ranges: small, medium and large. Vocal mics generally employ large diameter capsules in the area of 1 inch, like the classic Neumann and AKG large diaphragm microphones. The medium sized capsule is not nearly as popular, but it is universally accepted to be a better choice if you want to capture a piano or a drum or acoustic guitar because it’s more articulate. The large diaphragm capsules make you sound bigger and “ballsier,” or breathier than you might normally sound through another type of mic, and there lies sort of an enhancing characteristic about large diaphragm mics. Things tend to get recorded with them in cardioid and they tend to have more output from the same sonic pressure pushing against its diaphragm. In the case of our GT55, it is 1.1 inch so we can get more energy out of that than we do with a diaphragm that’s 3/4-inch, like our GT44. Also, the proximity effect tends to be more sensitive on large diaphragms, so you can work that kind of microphone a bit more, if you will, by the distance that you’re singing from it.
Tell us about Groove Tubes’ new Disk Resonator technology.
It’s an additional component that we fabricate and add to the mic capsule that acts like a diffuser or resonator to more accurately allow high frequencies to exist where they would normally be rolled off or overpowered in other large diameter designs. One thing I can point out is that those types of large diaphragm capsules are great for vocals but they tend to have a softer top end or it rolls off a bit, and that’s the nature of the design of the large capsule. Just like speakers, as you make a larger and larger speaker capable of putting out more energy in the bass region, it becomes less of a good tweeter for making high frequencies. Typically then we go to 2-way speaker systems with a separate tweeter for making the highs and a bigger woofer for making the lows, but there are other ways of enhancing high frequencies. We found a clue there in speaker design that led to our developing the capsule Disk Resonator technology.
Could you elaborate?
OK, in the speaker world, one thing we used as a trick years ago, and still use, is a thing called the Whizzer cone. This was an added device to the original speaker whereby you took a woofer type speaker but you attached an ice cream cone looking thing in the center of the diaphragm, or voice coil. This allowed the high frequencies to not necessarily get blotted out as you increased the size of your speaker. If you go up to a 12-inch woofer or something, you’ve traded off highs to increase low frequency energy and, in doing so, sound waves that are literally, physically larger than the highs get muffled and have no way to jump off and be heard.
What speaker engineers did was they put a second, thinner cone in the center of the speaker that wasn’t really attached to anything but terminated at the voice coil. This Wizzer cone acted like a resonator that sat out there in mid-air letting the high frequencies “escape” unmolested by those big low frequency sound waves. This would almost be like the old type of megaphone they’d use at pep rallies where you sing through it and it projects a little bit better. This looked like one of those and just glued onto the cone. It naturally extended the top end of any speaker far beyond where it could have gone without it. This changes from speaker to speaker, of course.
How does Disk Resonator technology improve on that early engineering concept?
The way we approached that with the capsules had to deal with the same kind of trade off: big capsules lost high end frequencies but had more sensitivity and output. At the other end of the spectrum you have 1/8-inch and 1/4-inch capsules with very, very low output and very bad sensitivity but with great linearity, which means an even frequency response. They don’t put out a lot of signal for the pressure level but they’re extremely accurate because no waves can be any bigger than the receptacle, if you follow me.
Now as the bass waves hit the little tiny 1/4- or 1/8-inch capsule that would be in a B&K measurement microphone, which usually aren’t chosen for recording because they have very high signal-to-noise ratio and they are too truthful, generally speaking. At that very small diameter capsule, the difference between a high frequency wave and a bass wave is nil, it’s a moot point because there’s just no place for it to hit on the capsule. But as we get bigger and bigger on capsule the same tradeoff as the speaker analogy occurs, so to speak, between the bass and treble performance. As you get bigger in the diaphragm these capsules tend to have more energy and output and are better for reproducing bass and less so for high frequency, and at that point most large capsules tend to roll off in the area of 14 or 15 kHz, as well.
Now you might say that’s not really that important for vocals, and no, it’s not for vocals. But if you want to have that one mic that can do your vocal and also record your acoustic guitar or overhead drums, you’re going to find it’s lacking in those other areas. Also, it adds clarity and diction to the vocals that many engineers prefer. Incidentally, with larger capsules in general, this has not been an ignored issue before now. Other companies have addressed this problem in many ways. Typically they’ll modify the electronics after the capsule to recover top end. You can do this on your own recording console but they’ve chosen to do that in the microphone and you’re kind of stuck with how they’ve chosen to do that at that point.
Is that a problem?
If you ask me, having to use EQ for anything is the wrong way to go. If you have other options, it’s better to get the sound without EQ. If your guitar sounds naturally good and you don’t have to add treble, great, but if you’ve got a dull sounding guitar and/or amp and you have to add treble you can correct the inefficiency, but its not going to sound nearly as good as if the guitar sound good to start with. That’s the approach we took with Disk Resonator technology in our high-end large diaphragm mics.
How about taking us on a macro tour of the inside of a Groove Tubes tube microphone?
Here’s an idea of just how high it sits above the capsule. Essentially, you have the capsule and it has a backplate and a diaphragm strung across it, which is isolated from the backplate and has an electronic differential of voltage applied to both elements. They’re separated or isolated and we apply a positive and a negative voltage: one to the backplate and one to the diaphragm. This is what is commonly called a true condenser capsule. As the sound hits the diaphragm, it moves closer to the backplate. At that point, the potential of the electronics that we’ve applied changes and that little change is where we pick off our signal that we will send to the electronics for conditioning. What creates the signal is that differentiation as the sound waves pounding against it agitate the diaphragm.
Now, in a very large capsule, say our 1.1-inch diameter capsule, those bigger sound waves kind of collide onto that diaphragm and they tend to overpower the higher frequency waves which can’t kind of hang around for very long, which of course is just a split second. So the highs tend to dissipate very quickly and that’s where that roll off phenomenon comes from. This is generally true with all large capsules on the market today. That’s where the Disk Resonator we discussed earlier comes in.
So what is different about Groove Tubes’ approach to managing and maximizing diaphragm size?
Its just physics, really. The distance between the diaphragm and the backplate is typically 3 to 5 microns, with human hairs being 40 microns wide so we’re talking about something that’s about a tenth the thickness of a human hair. Our diaphragms, incidentally, are thinner than any others on the market to my knowledge. There might be some other companies now working at the 3-micron level, but we were the first company to offer a 3-micron diaphragm when we started out years ago.
But first, a little sidebar here on the diaphragm, which is like the eardrum of the capsule. It is very critical. The really great classic mics of old, i.e., the [Neumann] U47s the [AKG] C12s that I have here in my collection, had diaphragms that were fairly thick by comparison, but relatively thin for the time they were produced. They ran anywhere from 8 to 12 microns thick, and currently the modern microphones that those same companies are producing are 6 to 8 microns.
Were you inspired by any frameworks that existed in the earlier days?
When we started out doing microphones we took a look at a lot of people that were repairing vintage mics and upgrading them, and even hired a few as consultants. One guy out here on the West coast, Steven Paul Audio, made quite a reputation by taking old Neumann mics that needed to be redone and actually rebuilding them in lighter weight diaphragm materials, materials that weren’t available to those companies when they made them back in the 1940s and ’50s. This is essentially kitchen plastic wrap that’s called Mylar by the 3M company who specially produced it for us, and this is made in a 3-micron thickness. For SPA to a rebuild a Neumann U87 you would take it down from 6 or 8 microns down to 3 microns. Mind you, people were flipping out over hot-rodded mics and there were even legal battles between a famous vocal group when they split up over who got the SPA mic that had the 3-micron modified diaphragm. This has been a trend in recording, and they are still getting $2000–$3000 to rebuild vintage microphones there.
These days, what’s the thickness of most manufacturers’ large diaphragm condensers?
6 to 8 microns is average.
I’ve read of “gold sputtered” diaphragms on many spec sheets, what exactly are they?
They are incorrectly called ‘sputtered’ because we as an industry don’t use that process any more. With modern mics you’re basically trying to apply something that’s conductive on plastic and you’re metallizing the plastic so that we can then apply a voltage. Originally, the very first condenser capsules were made by pouring nickel into a sheet and then stretching that nickel sheet over the diaphragm mounting ring. It was then edge-terminated to each side of the mounting ring that held the diaphragm, then insulated from the backplate with an insulating washer so that you could then apply your polarization voltage to the front and back of it to create the potential capacitance that make a condenser mic go. When we first started working in thin plastics you would put the plastic material in a bell jar and you would pump out the [air] and you would atomize gold and literally blow air on it and “sputter” those atoms onto the plastic, much like blowing on a straw in your Coke.
In recent times, we have higher and higher degrees of vacuum that are achievable in these vacuum chambers where we process our diaphragms. These modern chambers now get down to extremely low atmospheres, so basically when we atomize the gold it actually floats in the chamber and “evaporates” itself very evenly on the diaphragm. We go from solid to liquid by melting the gold. Then, in the liquid form, the gold evaporates into the atmosphere and onto the stretched plastic that’s already been tensioned on the mounting ring. We can also now get a much more even distribution of the material on the Mylar. Technically, it’s an evaporation process where it used to be a sputtering process, which was a cruder, earlier version of the same process of trying to apply metal onto plastic. Having just said that, one of the secrets to our microphones is the way we do that evaporative process.
Can you share that secret with us?
Not really, nobody publishes these processes, so we had to learn by trial and error. It took 20 years to get to the level we are at now, which we feel is world class. For example, you only need enough gold material deposited on the Mylar diaphragm to create the conductivity, so the object is to keep the diaphragm as thin and as low mass as possible. You want it to be as accurate as possible, and the thinness equates to the density or the mass of the diaphragm. The thinner we can make a diaphragm, the more articulate and transparent the sound will be. So applying metal to it is an opportunity for disaster because we if we put too much on there we’ve just defeated our goal of going from 6-micron to 3-micron diaphragms. We want to get a very minimal amount. In fact, when this gold is applied to some plastic and you hold it up to a light you can see through it very easily, that’s how extremely thin we apply it.
Specifically speaking, there are about five to six gold atoms deposited onto the 3-micron Mylar diaphragm in our larger capsules and slightly more with our medium capsules. It’s very difficult to get something like thin gold to stick to thin plastic, so we use a secret process to deposit a substrate. We actually apply this material onto the Mylar in order for the gold to stick to it. So, the final result is a 3-micron diaphragm with a very, very small fraction of that, maybe as much as 10,000 times less, in the gold thickness added on to it.
How do most mic builders attach that metal to plastic?
Well, that’s everybody’s secret formula and no one has ever written a paper on that for the AES [Audio Engineers Society]. It’s not something that anybody wants to divulge, and I am sure everyone has their own system that works for their microphones. I can tell you how the original Neumann guys did it because that’s history and you can see photos of them sputtering into little bell jars on top of a lab counter. There’s imperfection in any hand-controlled process and that’s why all their capsules and mics of the same model sounded different from one to the next. There are other reasons capsules sound different, too, and it has to do with different manufacturing processes.
There are several processes we do after we put the gold on the diaphragm and we’re constructing the mounting ring and capsule. One of those is that we stretch the diaphragm like a drumhead across the ring and then we attach it to that ring. The stretching process is critical because the diaphragm has to be tuned to give even response. It has to be tuned just perfectly because we know just how much we want it to react when it gets hit by sound waves. If it’s too loose, it will literally collapse on the backplate because you’ve got a polarization voltage there of maybe 100 or 90 volts DC. If you’ve got a positive 90 VDC sitting on one side and a negative 90 VDC on the other, well they’re just dying to get together and arc over, you know what I’m saying?! What’s preventing them from doing that is the metal is on the top side of the diaphragm and the back side of the diaphragm has no metal; its plastic, so it’s insulated from the backplate. But if we were to increase the voltage to some point on any capsule ultimately we would pull the capsule’s diaphragm to its backplate and it would literally melt through! Tuning the capsule is like tuning a drum head in the sense that you’ve got to get a very precise amount of tension on there, not too much or too little, and it shouldn’t change over the life of the capsule. And there’s the other big caveat: when these capsules get into different temperatures and humidities you get different performances from the capsule so you have to stabilize it.
How does Groove Tubes stabilize capsule humidity in the factory?
That’s done through a repeated cooking operation in ovens where we heat these things up after they’ve been stretched and tensioned and deposited and you’ve got your diaphragm sitting on a mounting ring. It goes through hours of baking out in pre-arranged ovens for certain lengths of time in a process called aging. We want it to “age” in our lab so that it doesn’t age in your studio, so to speak. This is an amazing process when you think about what goes into a capsule. It should be noted that no amount of aging could prevent adverse results if a capsule comes in contact with a high level of humidity. Any excess moisture in the air will result in a popping noise and/or perhaps even no output from any condenser-type capsule, especially in studios near the beach without air conditioning or heavy breathers singing too close to the mic over the years.
The backplate has a bunch of holes drilled into it, which are designed to relieve the back pressure on the diaphragm. In other words, we want the diaphragm to move freely and not be pushing against a fixed amount of air so we create these little holes in the back of these capsules, in the area of 100 or more holes drilled into every backplate, and there are two backplates in every capsule. So there are hundreds of holes drilled, some all the way through to the other side of the backplate and some only down about 3/4 of the way through and they have a precise angle of termination. These are all polished so that there’s no rough spots and these holes have to be very clean, the holes that go through and the holes that terminate. Then the whole backplate surface has to be lapped with very specific surface grinding machinery that gets them so flat that they are actually flat to a small degree of light. This is done in the atomic arena. You hold this in your hand and you’re looking at something that’s probably the size of a 50-cent piece that has gone through 150 machine operations.
Then you’ve got the diaphragm, and it has a couple of dozen holes drilled because its going to be tensioned on there with more lugs than you’d have on any snare drum, let me tell you! You’re going to have also a very, very thin piece of insulating material in the range of 7/1000ths of an inch of this washer that holds the mounting ring off of the backplate to whatever degree of spacing you have here. That’s attached, and then these two backplates are mounted to each other and there is a ring that separates them because we have to allow for barometric pressure so there’s a slight little air escape valve in that ring that allows the two backplates to have a neutralized atmospheric condition that doesn’t change, or can change but won’t change the way the capsule works. Then this is all assembled by hand and there are probably somewhere around 25 screws that are screwed, much smaller than the ones in your eyeglasses, that hold all this stuff together — yet this all done by hand! Then when you get done building the capsule with both sides done and all the holes drilled and everything wrapped perfectly and aged and tensioned just right and its sitting there waiting to all get assembled into one microphone casing, that’s an amazing moment.
Most people probably don’t have a clue how much work goes into Groove Tubes mic capsule alone.
You’re looking at more processes and more hours of hand labor than you have in building a Martin guitar. It is just an incredible, incredible process and it’s amazing that the mics are sold for as little money as they are. If you were to separate out each step I’ve just touched on and figure out how long it takes to drill out each hole and how long it takes to prepare and assemble the capsule, it would be mind-boggling. Everything we do, from the aging oven, to the way we evaporate the materials, to the way we control the drilling and lapping, is a computer controlled operation. Therefore, our tolerances are a lot closer and we’re able to make mics that are a lot closer, and we’re able to make mics that are very close in performance from one mic to the next. We build the old style classic capsule but with modern production techniques that allow us to achieve a finer tolerance #8212;even computer-controlled means its all still manually operated and programmed.
Can you tell me about using injection-molded backplate construction in microphones?
Yes, this has been a recent shift in the industry. Our competitors are making the backplates with injection molding plastic which gives you a repeatable result, but it means you’ve got to use some sort of a plastic for the backplate which does not act or sound like brass at all. We use pure brass and that’s how all the old capsules were made and we think that’s a big component of why they sound so good.
One of the things we’re making a real point of with this new line of mics is our stereo matched pairs approach, which can only happen if you have a pretty close group of mics to begin with.
What exactly constitutes a matched pair?
The industry standard in years past would be that you request a pair of matched Neumann 87s from Gotham Audio, who for years were the Neumann distributor and are still a dealer, I believe, and they would charge you 20% more. For this extra charge, they would go through their 20 or so mics in stock and they would shoot them on something with a sound and produce a graph and those graphs would have to match from 20 – 20,000 cycles for both mics. Now, if the total difference between two mics was within a 4 dB window, say from -2dB to 2dB window, those would be considered technically matched. In audio, 3dB is an audible difference and that’s just when you get to the point of audibility difference when things are 3dB softer or louder you can hear that difference. You can measure very fine gradations between mics but you can’t always hear that measurement, but around 3dB or more those differences become audible.
It was back then and now is still pretty hard to find two mics out of 20 or 120 that are perfectly matched. The window that we’re professing and guaranteeing is a ±2dB window, which means no more than 1 dB up or down from center going from 20–20,000 cycles, which is half of what is considered to be an industry standard by Neumann’s distributor, and still is. Anybody with two mics within 4dB of one another has what’s considered a matched stereo pair, but our pairs are within 2 dB. Our processes and our tolerances are that close and that finely tuned. We’re proud of that and enjoy passing it along to benefit our customers.
What polar patterns are you offering in the new mics?
The medium size range of Neumann, AKG, and other such mics have been offered in different polar patterns, usually cardioid or omni, instead of interchangeable capsules for the same mic body. We actually have a hypercardioid, which has a more directional type of capsule than a cardioid. We’ve been able to engineer the capsule to have similar outputs, or sensitivities, to each other.
This is significant because the competition basically has an omni version of a certain microphone, which is a complete mic with capsule and electronics attached, and then they’ll have the cardioid version, which is a separate mic, so if you want to have both patterns you’ll need to buy two mics. The reason for that is the way they make a cardioid capsule is typically that they seal the back of the capsule, so the backside of the diaphragm has literally no escape for air and the response becomes very omnidirectional. If we open up the back of the capsule, letting in air from the back, it begins to reject the signal from behind it, and it becomes more directional. So cardioid capsules have a vented back and omni capsules have sealed backs and hypercardioid is something in between.
This is how you achieve different polar patterns with a single sided capsule. But the difference between a vented and unvented capsule means it puts out different levels of sensitivity which means the following electronics are looking at a very different signal level coming at it, more output out of a cardioid, less out of an omni. That’s why traditionally all of this range of mid-sized mics has been made as omni or cardioid versions, you had one or the other.
What we were able to do is make an interchangeable capsule with one fixed set of electronics. That meant we had to do our engineering in the capsule to neutralize the outputs and bring them in line so they could use all the same electronics. We’re the first company to actually ever do that. So now you can choose between tube or FET electronics, following the capsule. In either case, the GT33 FET and GT44 Tube is equipped with a cardioid capsule, but if you want the omni or the hyper you can just buy that capsule and slap it on there. That’s some new evolution we’ve been doing and it is quite a coup for us.
Microphone Electronics 101
We’ve been talking about the physical attributes of what makes a great tube mic. Let’s get into electronics.
Most people think a condenser mic requires the electronics to amplify the signal, but that’s wrong. The signal level coming off these condenser capsules is quite adequate to be processed down the wire and into your console, but the impedance is not. We typically deal with impedances in the real world of 100s or 1000s or ohms, but actually the impedances coming down off the capsule hitting the next stage of electronics is billions of ohms. In fact, it’s about a 1.5 gigaohm load impedance that we then have to convert into a real world impedance of 20 or 30 thousand through a transformer. We get down to a couple hundred ohms that we’re going to want to send down the microphone line.
It’s really important to understand what the electronics do in a microphone, because then you can start using analogies and understanding why our electronics sound so good, and maybe other ones don’t sound as good. The way we would contrast that would be the job that we’re doing#8212;it’s not about amplifying, which is what most people think microphone electronics are about, regardless if you’re talking about a tube or FET mic. No, in fact the amplification factor in these little mic head amp circuits is usually no more than one or two times, very little gain is added.
We do convert the impedance, and when you think of impedance converting as a goal, one of the things that you can contrast it to is the impedance that changes when you’re using a matching transformer in something, for instance like a studio input console. Your signal is going to come down the line and it hits the input console. If you’ve got an old console with a Neve module and it has a high quality Jensen or Cinemag transformer in there, then you’ve got a great sounding board. However, if you have a cheap transformer or no transformer at all, it doesn’t sound nearly as good. Whatever math job the transformer is doing in this case, the quality of a transformer is measured by how little it changes the sound. Very high quality transformers are the ones that do the math of converting things without changing the sound. Would you agree with that?
Yes.
So these electronics we’re using following the capsule, they have the same goal: to do the math but keep in place all the artifacts the capsule is recording. That’s the trick. How do you get the dynamics and the frequency response and all of the other artifacts of the sound to come through that transformation of electronics? Usually these higher quality condenser mics also have an output transformer there in the final stage, to give us both the isolation aspect as well as some additional math. The vast majority of that is done with the front end.
Now there’s a fundamental misconception about tube electronics and audio that needs to be talked about and addressed. It’s the fundamental starting point of where we differentiate ourselves from all the other mic manufacturers out there. It all comes down to the difference between solid-state electronics and tube electronics. What is it we like about tube electronics, and if we’re going to build tube electronics are we playing the strength of what a tube does? Or, if we’re going to use FET solid-state electronics, are we playing with the strengths and hopefully eliminating their weaknesses? With tube or solid state, we are playing to the strengths.
Here’s my point: Most people think that we use tubes in audio because they generate a friendly distortion versus an unfriendly one. This is because measurements have been made and papers published that say that tubes have an even-order harmonic distortion character and transistors have an odd-order harmonic distortion, which is all based on the total harmonic distortion measurements that we commonly use in every kind of rating of audio products every day. Right?
Right.
And as musicians, we can say, “Yeah, we like tubes because when we crank up the amp it distorts nice and when we crank up a solid state amp, it doesn’t.” Well, long before you crank it up and it distorts, you like a tube amp for the clean sounds it makes, as compared to any solid-state amp. In fact, devices like a Neumann U47 mic or an old Pultec equalizer, which both were tube-based electronics, were measurably high distortion products as compared to similar studio products made today without tubes. However, even though I admit these older tube-based products have measurably higher distortion, they’re certainly not at the level of distortion you could call audible! They don’t even have 1% distortion or 2%, and frankly unless you’ve got dog ears you can’t hear much below 3 or 4% distortion! If these great things we said about tubes sounding warm, and warming up digital recording —”they make my digital recording sound better, right?”—right?
Right.
Or, “I really like the way tube mics sound in my ADAT,” or “I’ve noticed that transistor mics sound cold and tube mics sound warm.” These are great observations, and quite true, but they are not explained by some minor differences in THD measurements. Even though you can measure more even-order harmonics on tubes and odd-order on transistors, the conclusions are, “We like the way tubes distort our sound.” That might work for a heavy metal guitarist, but it doesn’t wash in a recording studio that tries not to add distortion, if they know their business. But that’s the conclusion that’s been drawn, and it’s totally inaccurate from several positions.
First, sound is not just THD. If you want to talk about sound very 2-dimensionally, then you can talk about how loud sound is and how distorted it is. If you want to talk about sound in the 3rd dimension, which is really what makes things sound good, then what’s the dynamic characteristic? Is it true and without distortion, dynamically speaking? That is where we believe the rubber meets the road when you want to talk about the differences between transistors and tubes. When they finally were able to measure pulse distortion or transient distortion, in other words when you snapped your finger is that really reproducing a good snap, or is it sounding deeper or more true on one medium and thinner and colder and less true on another?
Now you’ve got the clue to the difference between transistor and tube. It is a very noticeable dynamic difference between the two, but it is much more difficult to measure these differences. Transistors are loaded with dynamic distortion. If you’ve ever pushed a guitar amp up to its edge, you’ve heard the dynamic limitations of a transistor, whereas if you push a tube up to it, you’re going to hear THD but dynamically it still sounds and feels pretty good. This is because tubes have almost no dynamic distortion and transistors have loads, but nobody talks about that difference because it has only been through recent advances in measurement tools that we could learn this.
You mentioned transformers affecting sound quality earlier. How does that work?
What makes a great transformer isn’t just that it does the math, but that it audibly or dynamically distorts the signal while it does the conversion. In fact, the better transformers are bigger because a smaller one tends to saturate, and where they break down first is dynamically when that happens. You lose the peaks of your system so things sound compressed or saturated. So you go to a bigger transformer core and it doesn’t do that any more, so it’s a better transformer, not just from a frequency response or THD, but from a dynamic stance it’s a better transformer.
How does that apply to building a better sounding tube mic?
If we’re going to build a tube product, whether it is a microphone head amp, or a preamp, or equalizer, we’re not going to buy into the general industry misconception that we’re producing better sound through making only even-order harmonics and therefore let’s have a button that says “More” on it. You turn it up and it saturates more and adds distortion. Distortion generally will color your sound and make everything sound like that distortion and it will take the diversity out of your recording and make everything sound very flat or uni-dimensional.
Unless you’re making records for a rave concert where you want lots of distortion, generally the job of the engineer is to eliminate distortion! Bad cables, bad connections, anything that makes distortion we want to go away. Anyway, we can spend $20 on one transformer that might cause some distortion and $200 on one that won’t, but we’ll always spend the $200 because we can hear it. We’re trying to make the lowest noise, lowest distortion tube circuit possible in the realm of frequency response and harmonic distortion. And we know that the device we’re using already has an inherent very low dynamic distortion, so that’s how we’ve developed tube products. Conversely, when we’re developing solid state products, we’re not just looking for lower noise floors or distortion characteristics, because op amps have less of both compared to FETs, but op amps don’t sound as good as a FET. Why?
Why?
Because dynamically, op amps make a lot more distortion than a FET. FETs are much lower in dynamic distortion because they have a field grid like a tube, they’re actually trying to emulate a tube. That’s what a “field effect transistor” means, it isn’t just a switch going on and off. It has a third component where you have a field that regulates that switch going on and off, much like a tube has a grid that regulates the flow of electronics and has a similar kind of construction to it. The result is that FETs are a little noisier than op amps and have worse harmonic distortion, too, but because they act more like a tube they tend to have a truer sound dynamically.
Op amps have lower amounts of the types of distortion that are measurable, but not audible as compared to FETs. However, they have far more of this dynamic distortion and that is audible! People hear that and they say, “I like the sound of a FET better than an op amp.” So we’re using two FETs instead of five op amps like the 414.
Sometimes in the quest for lower or better numbers you can lose the art, and art is the goal. We don’t do that and we’ve been looking at the art since day one. We always stand back and look at the big picture before building a transistor head amp for our special mic capsule head amp so that it sounds warm. People listen to our FET mics and they say, “That sounds more like a tube mic, it’s so warm.” Well, yes, it is, because we’ve picked devices and regulated things that will be dynamically correct as a first goal. And we’ll trade off audible dynamic improvement for a slight difference in the noise level or in the harmonic distortion, which you can’t hear.
The bottom line is that our tube mics are a lot cleaner and have lower noise and lower distortion than other tube products because we’re not buying into the “tubes distort evenly, so add more” lie. Same thing with our FETs, which are going to be a lot warmer and richer sounding.
Tube Rebel With A Cause
You have a unique philosophy about sound and making mics.
Well, yes, it is not the normal “tube party line,” but it is one I can support. One of the things that I use to support this argument—and this is an audio rebel’s argument, if you will—is I don’t accept the idea that we like tube stuff because it distorts different or better than a transistor. I think we like tube stuff because it doesn’t distort dynamically, and transistors do noticeably and measurably distort dynamically. We all have a built-in reference for dynamic realism in that we know what an acoustic guitar sounds like, so we want to hear the same thing when we record and hear it played back.
Where the hair starts going back on our necks, especially in recent years when we had a better dynamic recording realm, is this dynamic distortion we get from transistor signal processors. We noticed this less so in the old days of tape recording, but far more so these days in the digital recording mediums we use. And the really big “audio” advance that digital recording brought to our world was a wider dynamic range. Tape saturated, ADATs didn’t. It wasn’t just that we got lower THD ratings or lower noise, but what really happened was the dynamic window increased significantly over tape or vinyl or other things we’ve been recording on over the years. Digitally speaking we knew we had more dynamic window, right?
Yes.
So what really happened with digital recording when it came along was this immediate observation that transistor mics and the other signal processors sounded cold, while tube mics sounded warm. In other words, one was natural and one was unnatural because you could hear major dynamic differences for the first time. Couldn’t hear ’em on tape before, it saturated it away. In fact, tubes were kind of fuzzy sounding on tape and the dynamic window was very small back then. As we opened up that dynamic window with digital recording, along came this observation that tube mics sound better, therefore we’re hearing harmonic distortion that is more pleasing to our ear, and that was a major misconception. What you were really hearing was natural dynamics without distortion, and it made it sound more real and more alive.
The electronics of the microphone are early, where the signal is actually created from thin air into being electricity, that’s the real beginning of your signal chain! That’s where you’re going to hear the biggest difference in audio processors or amplifiers, and that’s why guys starting reaching for tube stuff. They had this new format with new clearer dynamic, a brighter, bigger window of digital recording for showing off the advantages of that old tube stuff again because man, it sounded better. Why does it sound better?
Why?
That’s where most everybody jumped to the wrong conclusion. This point goes to something a very wise old audio guy who got me started, Dick Rosmini, once told me: “There are things you can measure that don’t matter, and things that matter that you cannot measure—yet.” Everyone wants to go out and explain the same phenomenon using some measurement, “Oh, I think the northern lights in Alaska are there because…” Today, we’re literally at that point in audio, but we’re still learning. And one of things we’ve learned is these new dynamic measurements now show us that tubes have a fraction of the dynamic distortion compared as to transistor or op amps, and op amps have tons more dynamic distortion than a FET.
If you look at an AKG 414 mic, kind of an industry standard, lots of people would agree it’s very dry and personality-less type mic, then you hear about a U47 or C12 or one of our tube mics and they go “wow, that thing’s got life!” And they’re right, it’s very 3-dimensional and it has dynamic differences because it has dynamic truth, and transistors don’t. In an AKG 414 you have 5 op amps, and one of our Class A FETs you have two solid state devices, a FET and a bipolar transistor, which is what we chose to use for our mic head amp electronics which do the math from several billion ohms, the capsule’s output impedance, down to a few thousand ohms.
S. Bachesta
November 20th, 2016 at 11:36 pm
I own the convertible hard top GT mic. Great great microphone! I am going to buy the Aspen Pittman Hardtop………been looking for another one of theses great mics…..Thank you for still making this great mic.
Willie (PoppahWillie) Williams
April 17th, 2017 at 11:46 am
I just ordered two of these for my studio sight unseen, untested and no reviews read at the time I ordered them. I believe I am going to be quite pleased especially for the cost. I will get back to you with a brief review.
Bill Churchville
July 18th, 2022 at 1:07 pm
I was fortunate to work with Aspen in his studio/ museum in LA a few months before his untimely demise. Talking with him was like talking to a true renaissance man. I will miss him.
RIP Aspen Pittman