
Studio Remodel, part III
Tuesday, October 15th, 2013 | by matthew mcglynn
The third week of the studio remodel took, erm, three weeks. But I’m writing this update from the room in question! That means it has power, lights, and Internet. So that’s something.
Oh, you were expecting acoustic treatment and, I don’t know, microphones and instruments and stuff? Sadly, we’ll need another month before we get to any of that.
(Just joining? Jump to part I or part II.)
Day 12
 The ceiling and, eventually, walls got textured. This took forever.
The sheetrock guy had, on a previous studio project, been asked to do an extra-heavy texture coat of mud for diffusion purposes. He cringed at the memory because the visual effect was awful.
It seemed like a terrible idea. The length of a 20kHz audio signal is 0.67 inches. The maximum amount of variation in the surface of a stucco wall is maybe half that. So, you might have some audible diffusion above 15kHz, but you’d also have the world’s ugliest walls.
We agreed on a light texture coat. Guys in the trades call it “cat faces” for reasons that have never been adequately explained. It looks nothing like a cat’s face, but more like “a smooth finish that was executed very poorly.”
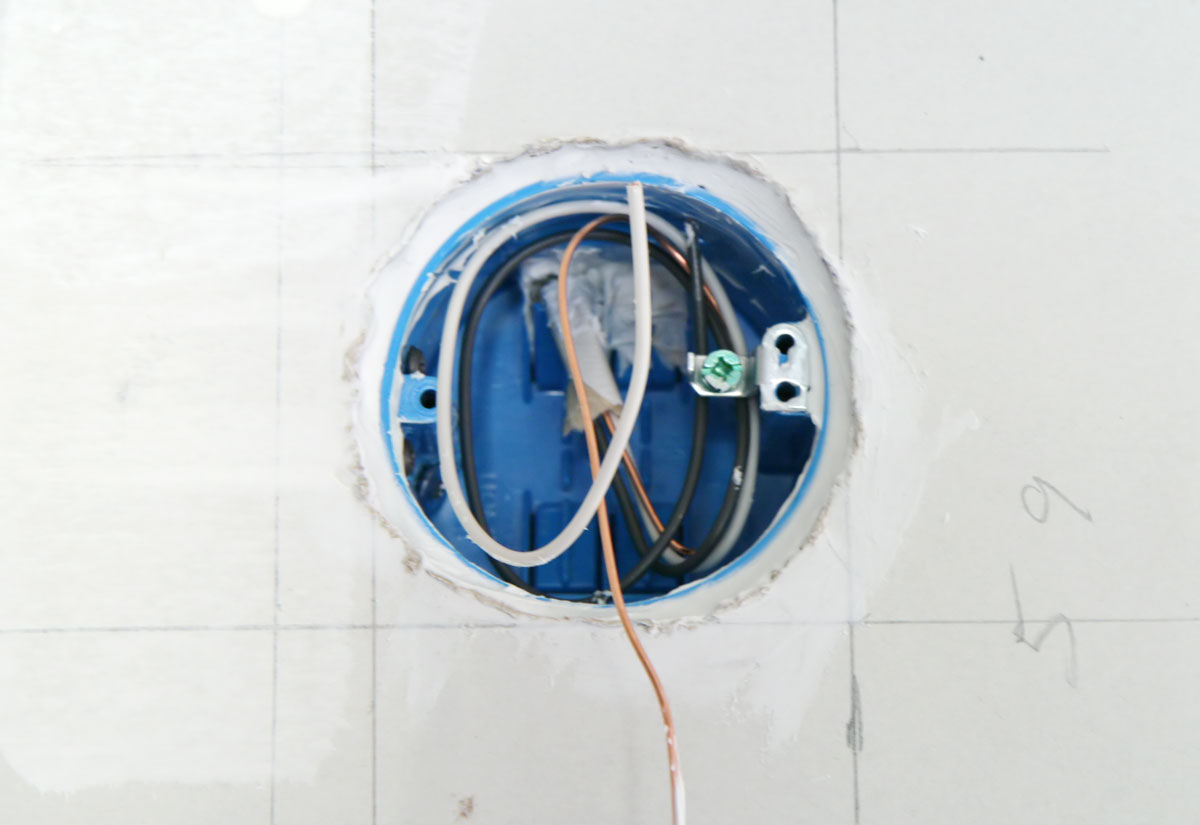 Roughing in the electrical fixtures is complicated in a room like this. We had spent all sorts of energy and time making, essentially, an airtight room. Any perforations or cracks will give a shortcut path for audio signals, right into the neighbor’s house.
But, assuming you want outlets and switches and lights, cutting into those beautiful airtight walls is required. So we caulked and sealed all the electrical boxes, both inside and out.
 At about this stage in the project I realized that we hadn’t made provisions for networking the studio to the rest of the house. The cable internet service would come into this room, which means we’d need to run CAT5 into the house. We’d already pulled in the coax, and one CAT5e for analog phone service, so we went back and pulled in two more CAT5e to run ethernet into the house.
Lesson learned, I hope: Plan ahead!
Days 13–14
 Two more days of texture coating and trim work got us to here, ready for priming and paint.
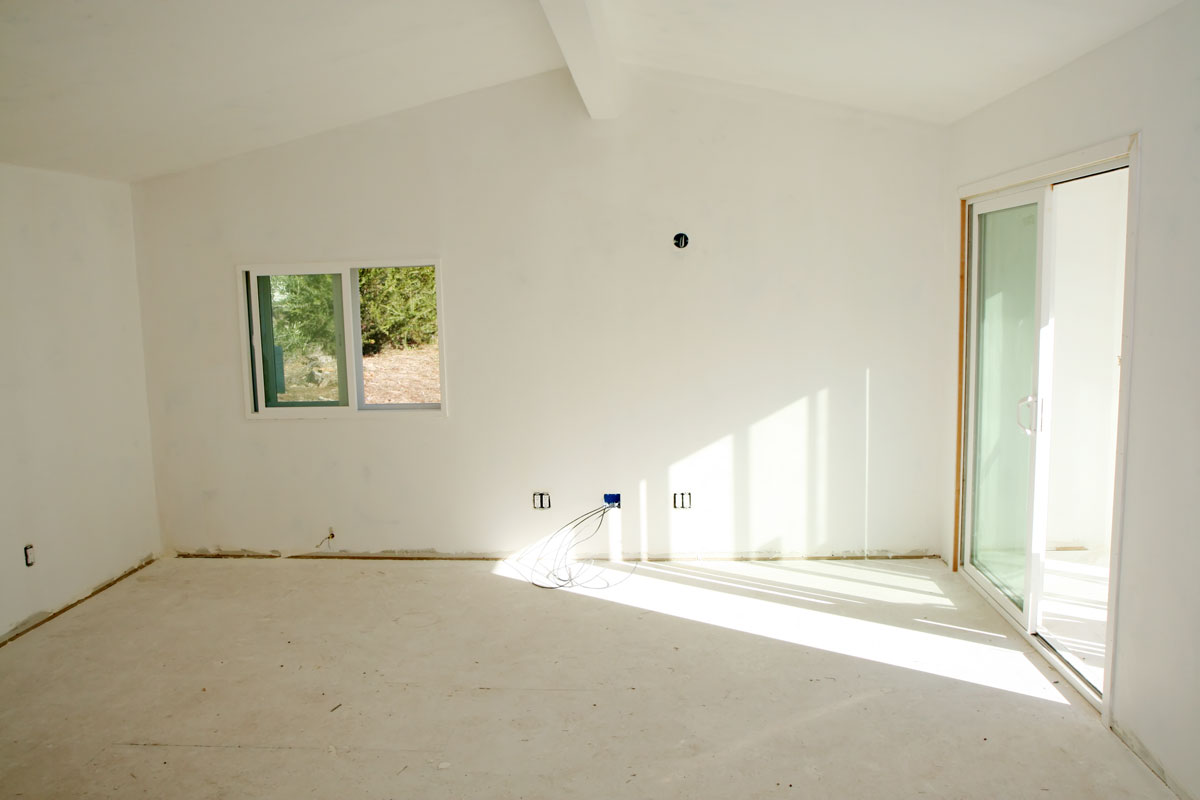
Days 15–16
Two days of painting. No photos, alas.
The major remaining piece is the floor…
Days 17–22, the flooring debacle
The acoustic plan called for a layer of Auralex SheetBlok as a flooring underlay. I was distracted with other issues related to the move, and found out too late that SheetBlok was essentially backordered nationwide until mid-October.
There are many other brands of mass-loaded vinyl, which I didn’t know until I researched the question. But that research also suggested that alternative products might actually work better. I first heard that from someone who sells both.
MLV, as I understand it, primarily adds “limp mass” to a structure. It doesn’t really add isolation or decoupling in a layered floor. But there are products that can do all of the above. We ended up with a 3/8-inch rubber mat, instead of MLV. It actually weighs nearly 2x more than MLV, and because it has some spring to it, can decouple a floating floor. The only problem is that we had to order it from out of state. I paid extra for, but did not get, expedited shipping. The “4–5 day shipping” took 7 excruciating days. Meanwhile, the room sat idle and empty. Hard days.
We were very fortunate that the contractor had flexibility in his schedule, and was able to employ the crew elsewhere while the shipper’s fleet of snails dragged my flooring across the country — and, more critically, to bring the crew back on site once the flooring materials showed up.
What was that lesson? Oh, yeah: Plan ahead. Maybe next time.
Day 23
 The rubber mat was laid out carefully, edge to edge. The seams were taped with duct tape, mostly because the crew wanted to ensure that the mat wouldn’t creep around after installation.
This mat was not glued down. It could be, but we felt that adhesive would not add any value, and we were eager to avoid the time, fumes, and expense.
 The floor is made of “AC” plywood. I now know rather more about plywood grades than I ever expected: the letters indicate the finish grade, with A having the fewest knots, voids, or other blemishes.
We didn’t go with a hardwood or stain-grade style for cost reasons. We looked at using OSB (oriented strand board), because it’s cheap and comes with a tongue-and-groove edge that is great for floating a floor. But I saw too many reports claiming that the wood chips can flake off. I like the look of it but I needed something more durable.
T&G plywood is usually graded CD — one side ugly, the other side worse. We wanted something nicer than that, but the nicer grades don’t come with the T&G edge. The solution was to buy AC sheets and manually carve (route) a lip into two edges of each board to create a half-inch overlap between adjacent sheets. The edges were all glued and stapled. The staples don’t penetrate the rubber mat.
We shimmed the edges to hold the floorboards 1/4-inch away from the walls. This means the floor is fully isolated from the structure — it doesn’t contact the walls anywhere — which should go a long way toward preventing transmission of mechanical vibrations.
Day 24
Once the plywood was down, stapled, glued, with seams sealed, and sanded, we sent the crew home and applied the finish ourselves. I spent so much time on my knees I wore a hole through one of them. I sanded the whole thing with an orbital sander, then finished it with three coats of water-based, low-VOC polyurethane sealer.
Day 25
Then the crew returned to install baseboards. We picked a material thick enough to cover the quarter-inch gap around the perimeter of the room.
Although baseboards are usually installed so they press down on the floor, in this case we let them float 1/8 inch above, again to prevent transmission of mechanical vibration from the floor into the structure.
Done!
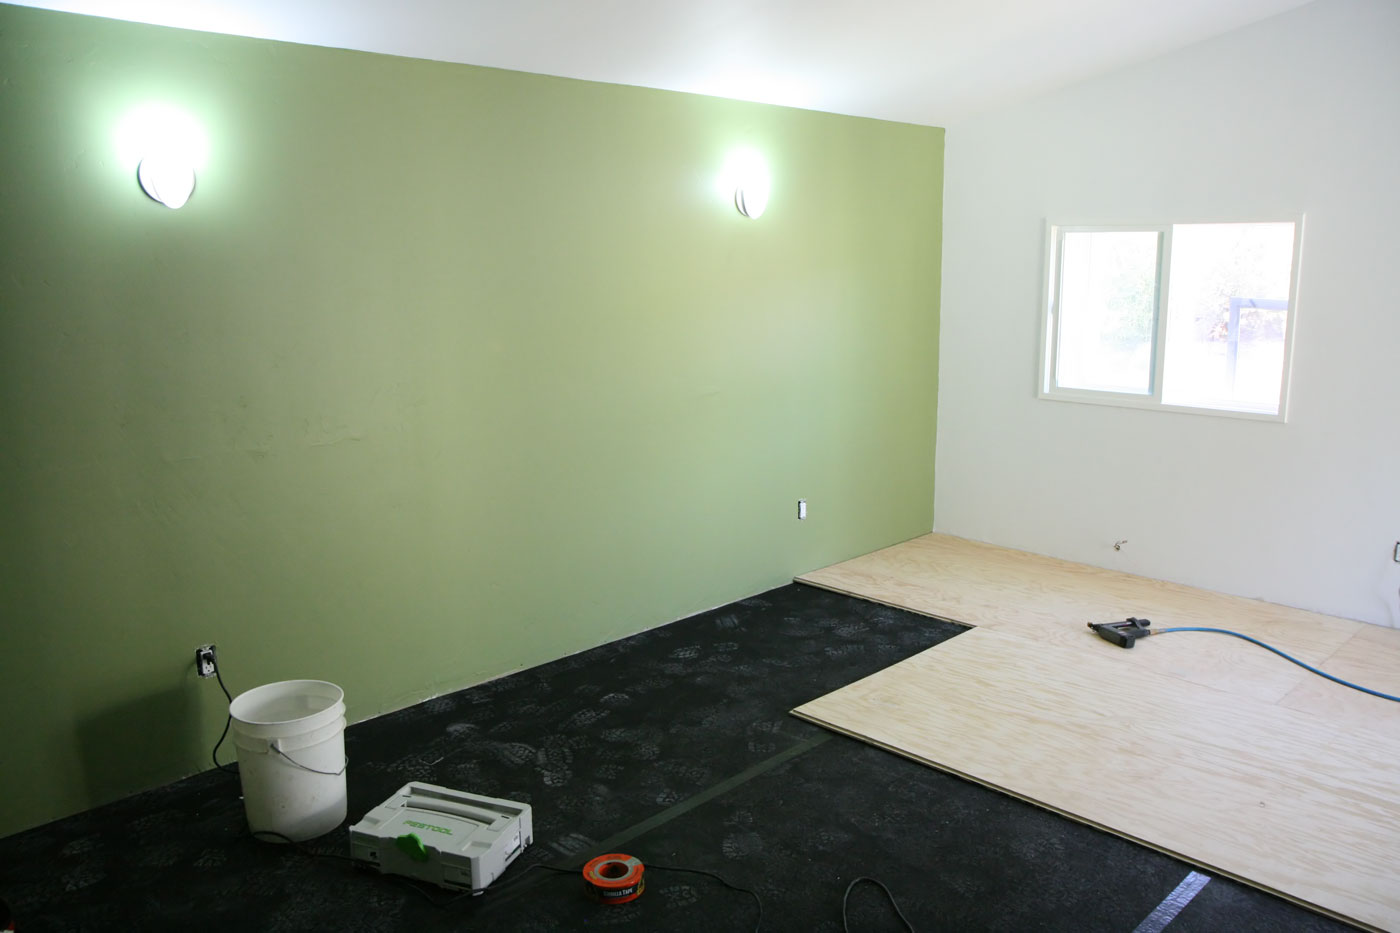
 The three wall sconces generate just enough light for the room, even loaded with 19W (75W equivalent) 6500°K bulbs. We stubbed out two overhead lights too, but I haven’t found any fixtures I like for less than $300 apiece. So, yeah, those will have to wait.
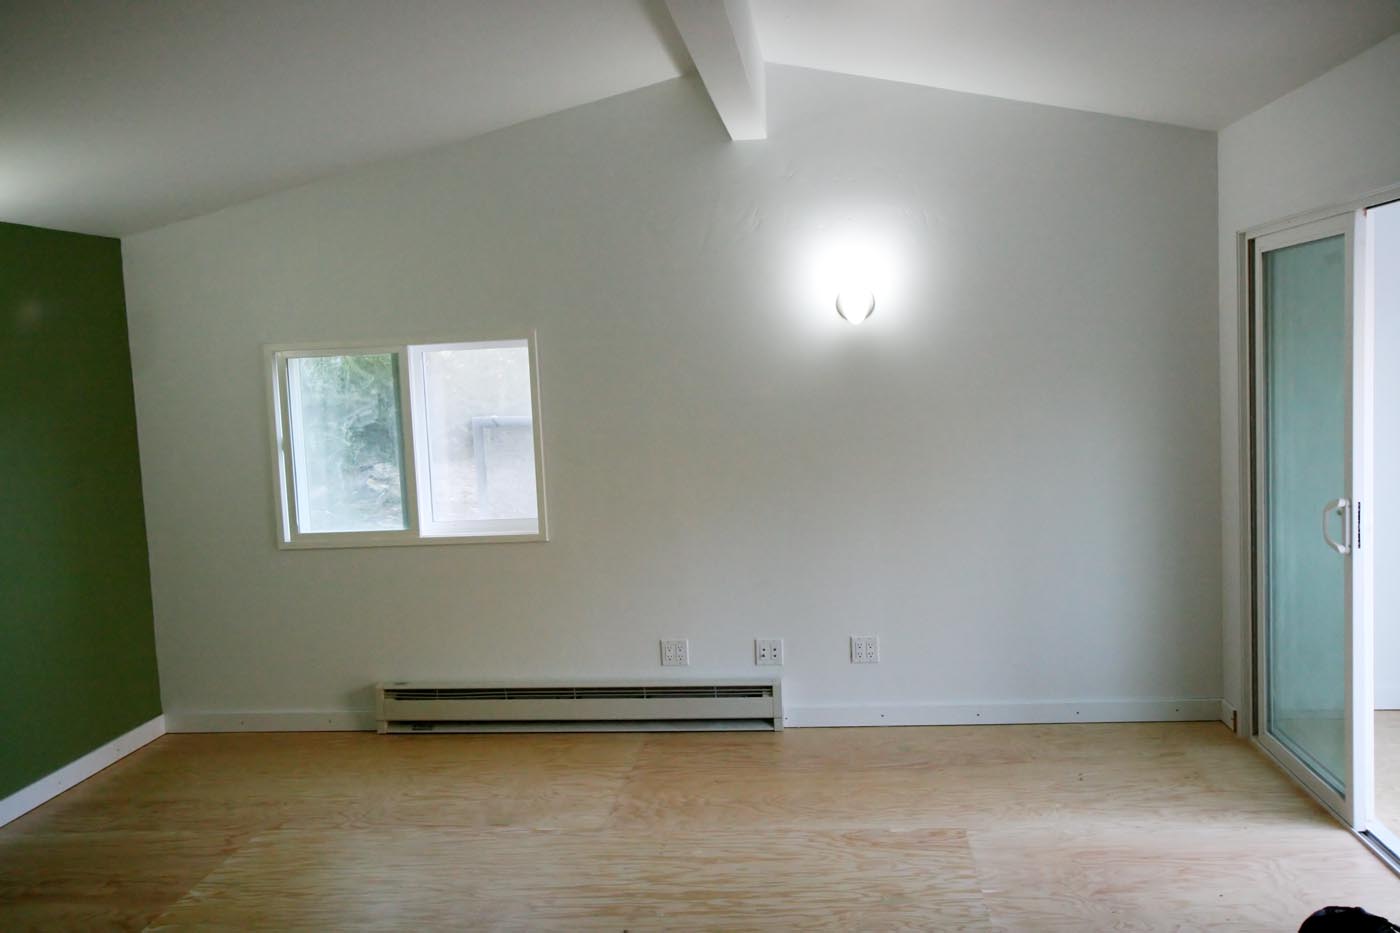 No, it will never be this clean again.
Next steps
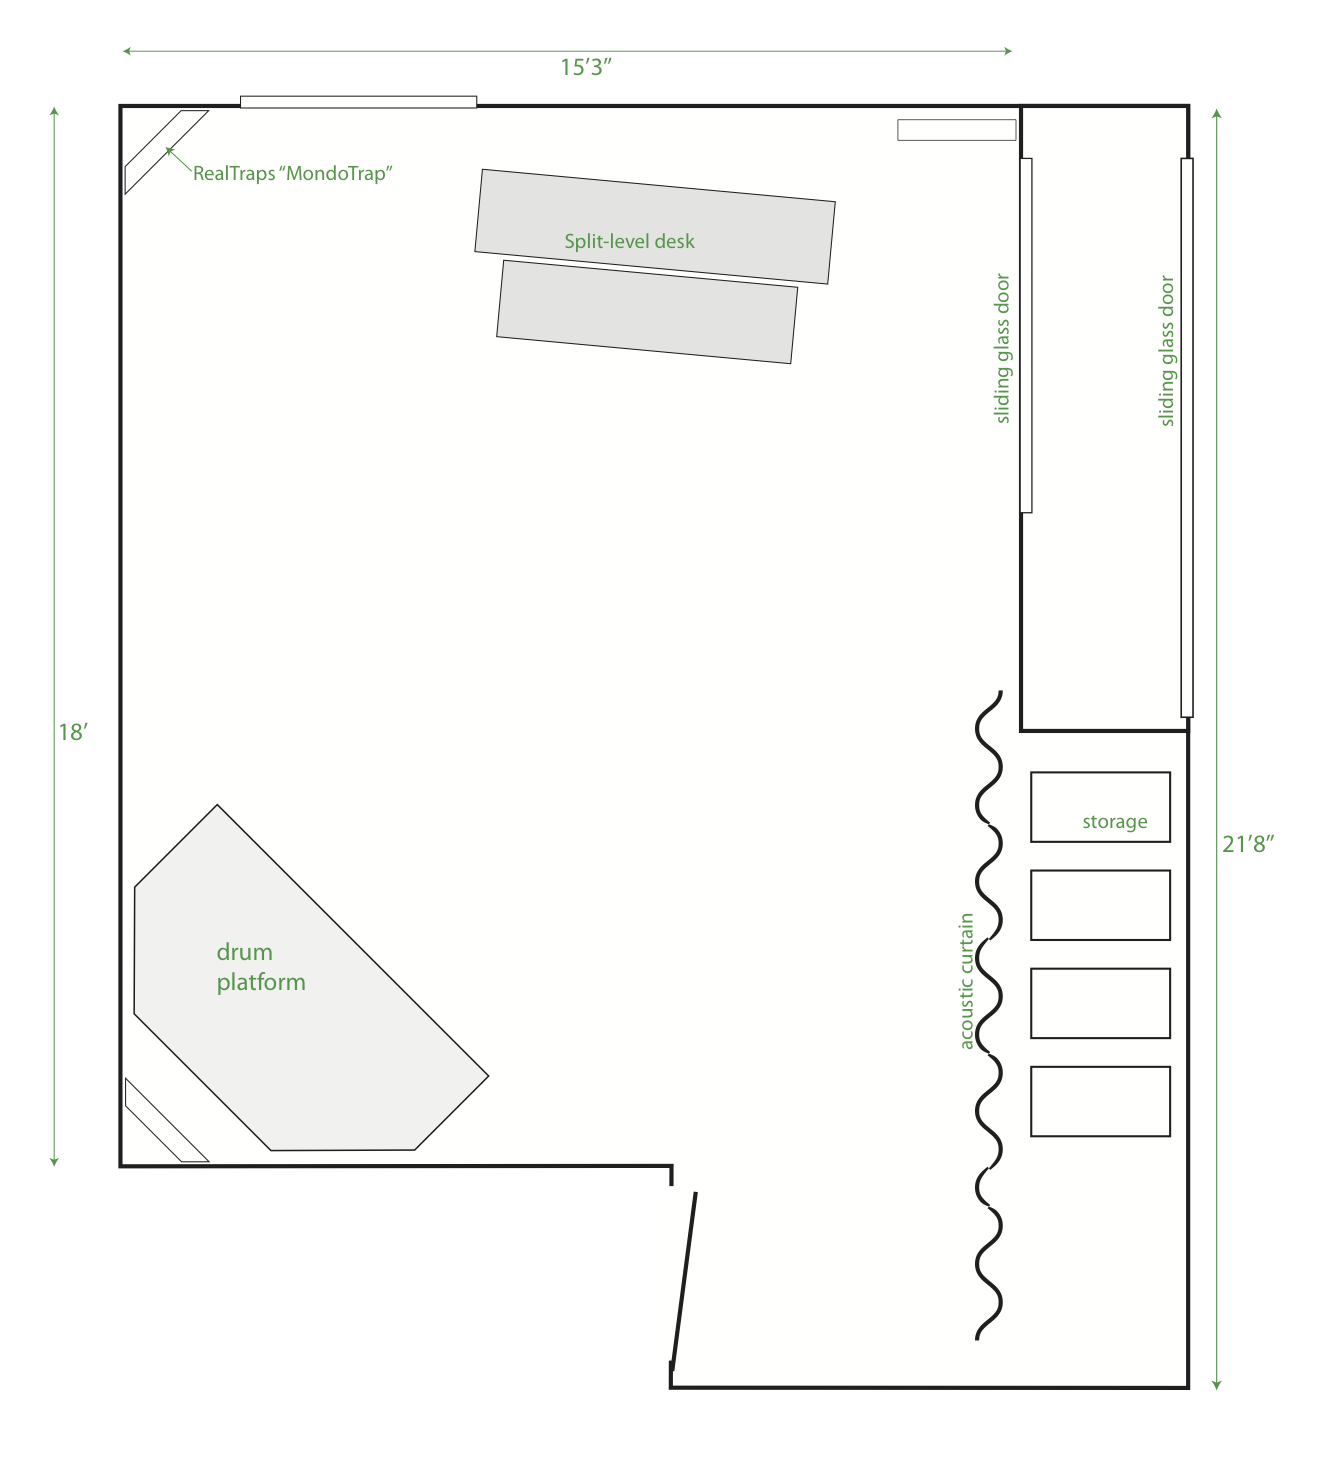 The room’s slightly goofy figure-8 shape and peaked ceiling mean it has less flutter echo than a more purely rectangular room. But of course I will be installing significant amounts of treatment.
Three MondoTraps are en route from RealTraps for the corners. Three Microtraps will be deployed as a cloud above the drum kit. Another half-dozen MiniTraps (all refugees from Ebay) will be spread around the ceiling/wall junctions.
The diagram at right shows an acoustic curtain that would serve to visually erase the storage area from the room, as well as provide a dead wall. I like the idea, but don’t intend to pull the trigger on it immediately.
I plan to do some before-and-after measurements to document the treatment process.
More to come…
Related posts:


Posted in Acoustics, Studios | 10 Comments »
DD Rivers
October 15th, 2013 at 3:21 am
Looks Like you are making good progress!
Rob Baillie
October 15th, 2013 at 12:56 pm
I must say I have found your studio construction saga fascinating and informative. My dream is to have a half-way decent space to record in, but we rent at the moment, so I’ll have to wait!
Thanks for taking the time and effort to share your experiences with the rest of the audio world.
And thanks for your invaluable website – the information has been most helpful and instructional to me for quite some time. Well done!
James Seabrook
October 16th, 2013 at 6:54 am
Great to see every step. Wish I had spent the time to document mine like you have. 🙂
Carey Langille
October 24th, 2013 at 8:51 am
How big? High? did your drum platform end up being? Is it Floating? thanks!
matthew mcglynn
October 24th, 2013 at 9:47 am
@Carey, I haven’t built it yet. My understanding (after insufficient research) is that decoupling it from the floor is one of the primary benefits of building one.
Height isn’t necessarily an advantage; overhead clearance is more valuable, IMO, and further, I think you’d want to avoid having hollow resonant chambers below the deck. Elevation also makes positioning mic stands problematic, because if the stands don’t fit on the deck, then they have to go on the floor, too far away. I’ve had this problem before and would avoid it now.
Jesse Gimbel
February 10th, 2014 at 5:55 am
Hey Matt, how is everything coming/did it turn out? I just read through the three parts and it’s been really exciting, but it’s a cliff hanger! I’m anxious to see where everything is now.
matthew mcglynn
February 10th, 2014 at 1:28 pm
My plan is to record some drum tracks in the room, then install the acoustic treatment (which is stacked up in boxes in the airlock), and then re-record. Maybe sometime in March…?
joe
April 30th, 2014 at 8:17 pm
I’m on a cliff hanger too, I want to see where it’s at now, with equipment in the space!
JC
July 1st, 2014 at 4:49 pm
Any updated pics of the space?
matthew mcglynn
July 1st, 2014 at 11:13 pm
Forget what I said about March!
The initial, “before” drum tracks are in the can. Half of the acoustic treatment is installed. The other half is stacked up in the airlock.
I’m in the midst of sessions for the “$1k Ribbon Mic Shootout” now, but will publish the final chapter of the studio remodel
around Aug 1eventually.