
Factory Made – Royer Ribbon Microphone
Saturday, July 17th, 2010 | by matthew mcglynn
The Discovery Channel’s “Factory Made” show covered the making of a  Royer Labs R-121 ribbon microphone. The video and transcript are below.
It’s gratifying to see the attention to detail that goes into the making of these microphones. Passive ribbon mics generate very small signal levels, so they require tight tolerances for good performance. The video makes clear how Royer achieves this result.
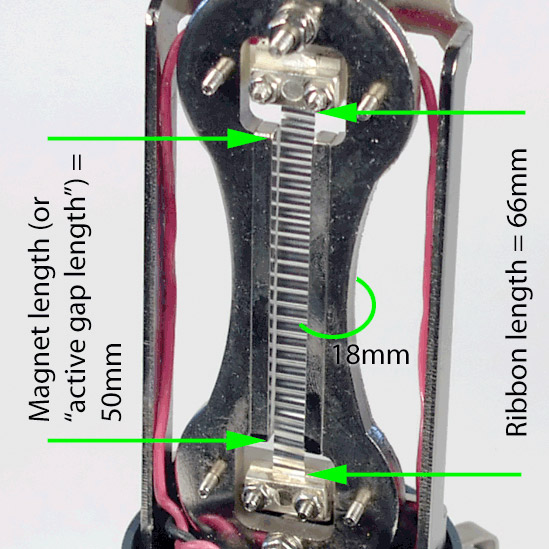
The R-121 has been copied by manufacturers in China, but I can say from firsthand experience that the copies show nowhere near the manufacturing quality as the original. See closeup photos of Chinese ribbon body and transducer parts in this ribbon mic transformer upgrade howto; compare to the transducer built in the video. Night, meet day.
Here is the Factory Made episode about ribbon microphone manufacturing:
If you liked this, be sure to check out the “How It’s Made” show about the making of a Neumann U-87.
Transcript of Royer microphones segment of Factory Made:
The quality of recording, like a music CD, is only as good as the microphone used to make it. That’s why top recording studios and artists rely on ribbon microphones, like this.
It gets its name from a small ribbon inside the mic that vibrates within a magnetic field to turn sound waves into electric signals that can be amplified and recorded. But how exactly do a few magnets and a ribbon come together to make pitch-perfect sound?
The inner workings of a ribbon mic are so delicate. Making a ribbon microphone starts with cutting a piece of tubing into 9-inch pieces so they can be machined into a strong, protective microphone casing for the magnets and ribbons inside. The tubing is made of cold rolled steel that is low in carbon but high in iron. The little bit of carbon strengthens the steel, while the iron makes it more magnetic to enhance the magnetic field inside the microphone.
Once the steel casings are cut to size, a metal lathe bevels the edges, so a top cap and bottom connector can be screwed on when the microphone is assembled later on.
But first, the steel tubes are dunked in a tank of cool water. It’s not to clean them; it’s to cut 24 slots into the casings so sound waves can travel through the steel to the ribbon inside. The slots are cut by an electrically charged brass wire that never actually touches the steel. Instead, it shoots 150 volts of electricity through the water towards the casings. The charge is enough to burn the slots into the steel, without leaving any burrs or sharp edges to be smoothed away. When all 24 slots are cut, the mic cases are polished with a blast of tiny glass beads.
While the casings are being blasted, a worker mills a steel block into the part of the microphone that holds the ribbon and the magnets inside. It’s called a transducer. It’s job is to convert sound waves into electric signals a recording device or amplifier can understand.
Here’s how it works. The ribbon that gives the microphone its name is mounted in the transducer between two magnets. As sound waves come into the microphone, they hit the ribbon, causing it to vibrate. The vibrations disrupt the electromagnetic field between the two magnets. That disruption converts the soundwaves into electrical energy.
The magnets used in the transducer are so powerful, they’re known as supermagnets. They’re made from iron, and a naturally occurring element called neodymium, the most powerful magnetic element on earth. The pull between two supermagnets is powerful enough to work through a human hand. They’re used in the microphone because they can pull more energy out of the ribbon, to produce a truer, more detailed sound.
The ribbons are made from sheets of pure aluminum that are so thin it would take 50 sheets stacked one on top of the other to equal the thickness of a single human hair. Just the slightest touch can turn the aluminum sheets into powder. But that sensitivity is why the ribbons are able to pick up the slightest nuances of sound.
To make a ribbon, an engineer uses a razor blade to cut out a strip of the aluminum that is 4 inches long and just a fraction of an inch wide. The material is far too fragile to be measured, so instead the ribbons are weighed to be sure the dimensions are right. If the weight checks out, the ribbons are carefully fed between two rotating gears in a crimping machine, to gently crimp a corrugated pattern into the aluminum. Corrugating makes the ribbon stronger without adding any weight or thickness. The grooves also affect the way the ribbon vibrates, to create a richer tone.
The gentle pressure applied by the crimper tightens up the aluminum strip. To be sure it won’t stretch out once it’s in the microphone, the tiny ribbon has to be stretched ever so carefully by hand to relax it after the trauma of the gears.
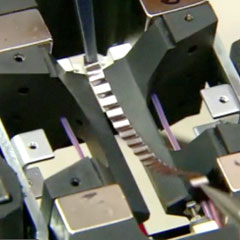
The riskiest part comes next: mounting the fragile ribbon between the two magnets inside the transducer. The ribbon is placed into the slot and screwed down with two brass clamps. The brass not only holds the ribbon in place; it also conducts electricity through the ribbon to move the sound signals through the microphone.
Before the screws are tightened completely, the ribbon has to be tuned to reduce noise made by the molecules in the aluminum that could distort the sound quality of the mic. It’s such a dicey process, about 30% of the carefully corrugated ribbons are torn as they’re installed and tuned, and have to be thrown out.
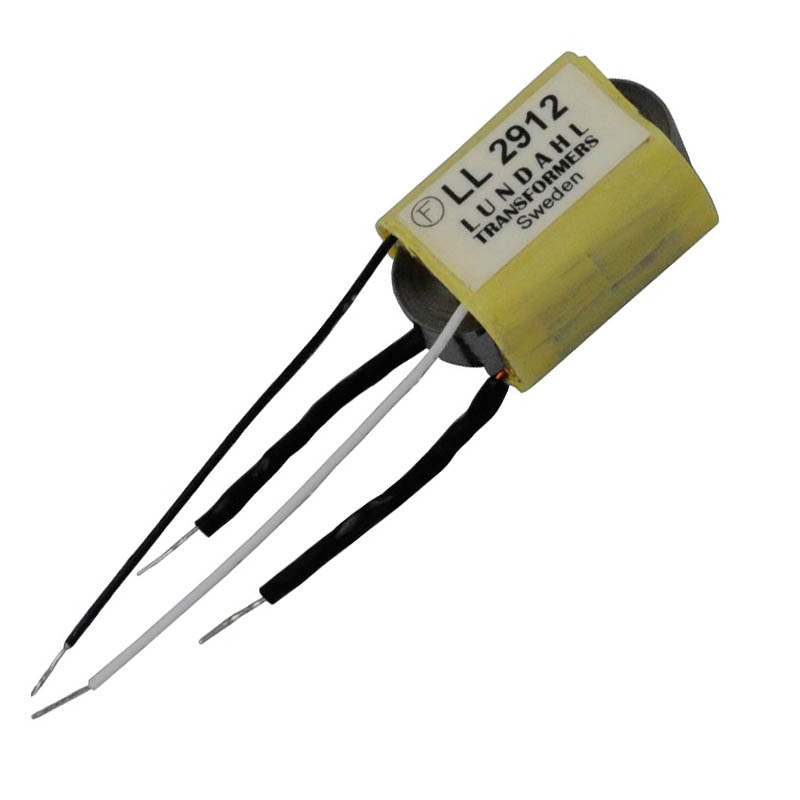
The ribbons that make it into the transducers intact are covered with stainless-steel screens to protect them from dust and dirt. Then, the transducer can be wired for sound. A small transformer is soldered to the brass clamp at the base of the transducer. It amplifies the electric signals, so they can be heard as they come out of the microphone.
Once the transformer is in place, it’s time to assemble the microphone. To start, a worked adds a windscreen to the inside of the protective steel casing. The screens will protect the delicate ribbon when it’s inside the microphone from the pressure of wind and loud noises that could cause the ribbon to tear. When the screens are in place, the combined
transistor[sic] transformer and transducer, which holds the ribbon and the two magnets, slide into two long slots along the side of the casing. A little cotton is wedged inside the case, to prevent the wires on the transformer from rattling around inside the mic. The top cap and bottom connector are snapped into place.And this microphone is ready to capture any musical or vocal performance, without any distortion or loss in the quality of the sound.
Related posts:

Posted in Microphones, Video | 5 Comments »
S!ick
July 18th, 2010 at 2:31 am
I’ve seen both. I hope to one day review some of their products…
paulf
January 9th, 2012 at 3:56 am
I’m shocked with all the technology they use to make the microphone housing they still cut their ribbons with a scalpel and ruler, same as DIY people, the most important part of the ribbon microphone is the motor assembly. Then they weigh the ribbon to check it’s accuracy 🙂 they must be VERY VERY accurate scales to pick up 50 micron difference in the width of a 2.5um thick ribbon. As far as I’m aware the optimal gap between ribbon and magnet should be no more than 125 microns how can you attain this accuracy on every cut with a scalpel and ruler? Varying gaps between magnet and ribbon of course would affect the consistency of performance in a batch of ribbon motors. Also no matter how sharp the scalpel is when you drag it across such delicate foil even if it cuts, it can leave minute tears in the foil best seen under strong magnification. Again, this damage will change the resistance in one ribbon from the next. I wonder how many ribbons they have to change out of the motors when they find inconsistent testing results, or maybe they just have ball park performance specs 🙂
Ryan
February 15th, 2012 at 11:37 am
@paulf, that’s probably why each mic has it’s own character. And I would think the crimper flattens out the sides. This goes a long way to explaining the high cost of these mics.
Brian
July 26th, 2012 at 4:18 am
Fascinating stuff. Shows you absolutely cannot mess around with ribbon imitations. What a joy it would be to own a Royer! That’s why I’m buying one!
bart
March 13th, 2015 at 4:41 am
hi, is the video available somewhere else? the embedded one is not working